|
<< Click to Display Table of Contents >> Invoices / Quotes |
  
|
|
<< Click to Display Table of Contents >> Invoices / Quotes |
|
•Invoices/Quotes
- Invoices/Quotes Drop Down Menu
Allows Invoices and Quotes to be created, viewing of Pending Invoices, Quotes and Backorders as well as view a range of reports.

- Manage Invoice
The Manage Invoice screen will display a list of all Pending, and Recurring Invoices
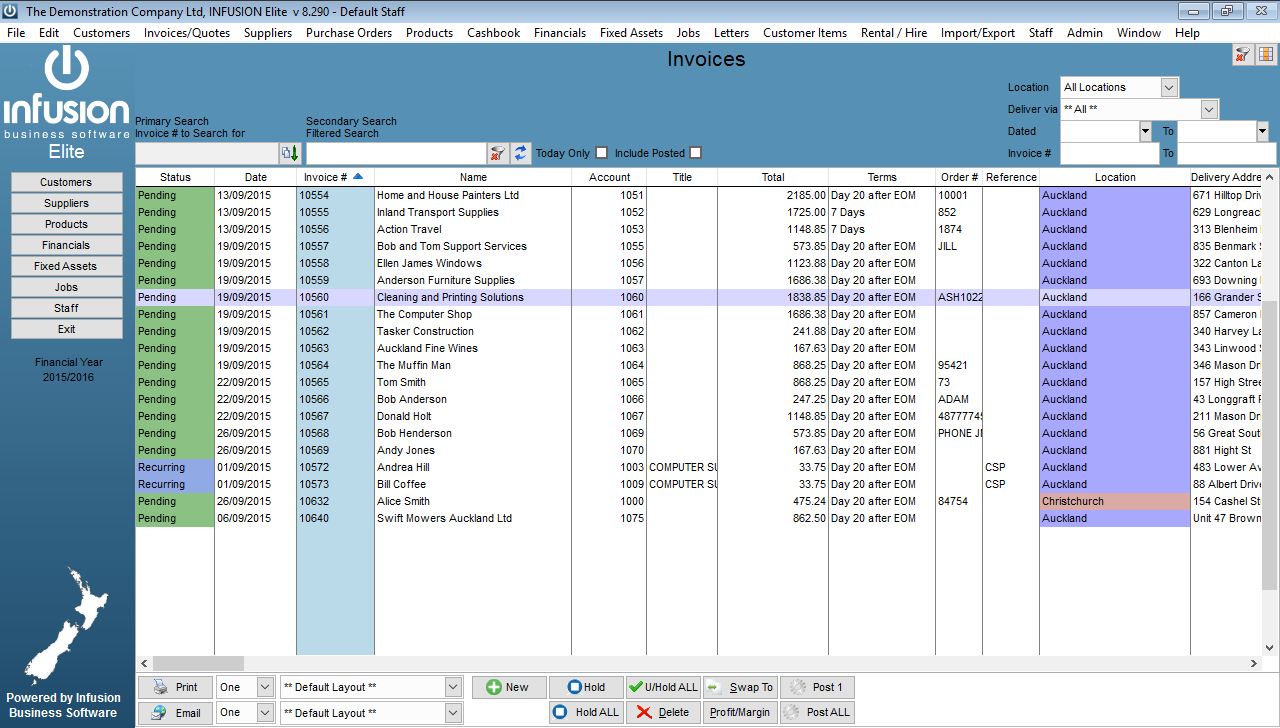
The Manage Invoice screen also includes additional information such as Delivery address, delivery method, date and time along with the cubic and weight total for the Invoice.
Selecting the Today Only option at the top of the screen will filter the selection to Invoices with today’s posted date only
Selecting the Include Posted will include all previously posted Invoices.
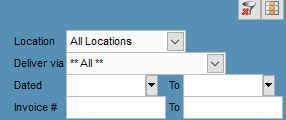
Additional filtering options are available in the top right of the screen. Here, a location or date range may be entered, or a range of Invoice numbers may be entered.
You can also filter on the delivery method; this is useful if you are looking for all Pending Invoices due to go out today via a certain freight method.
Right clicking on a Pending Invoice will provide you with a number of options.
You can print a copy of the Pending Invoice, print or reprint a packing slip for the Invoice. The Invoice can be emailed, to the Queue, emailed now, via the Queue, or sent via your local application such as Outlook.
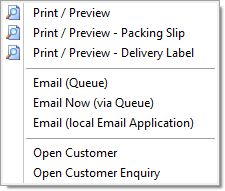
Access to this email functionality is set per staff member and must be activated under the Staff menu login section.
The Right Click menu will also allow you to the Customer account and update any details, or view the Customer enquiry screen.
If you right click on a Posted invoice, there will be additional options available: View Audit Trail and Edit Invoice.
Edit Invoice
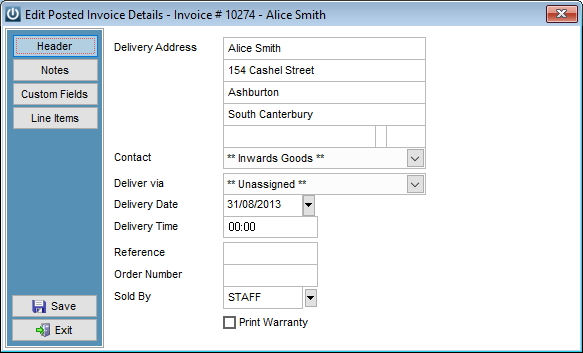
The system allows you to edit Non-Financial information on posted Invoices such as Delivery and Contact Information and the Sales Rep.
Additional Notes can be added and Custom Fields can be edited as well.
You do have the ability to adjust the cost price. This is done under the Line Items tab. Double click on the Code field and you will be prompted to edit the cost price. Select Save to update your changes.
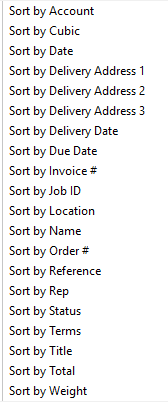
Searching on the Manage Invoices Screen
The Primary Search is only active when you have selected the Include Posted option. The following fields can be searched on using this option:
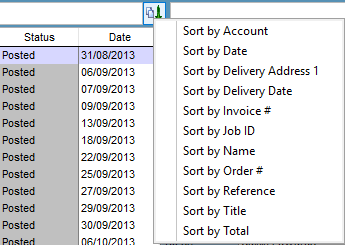
There is a larger range of fields to sort by when you don’t include the Posted Invoices.
The Manage Invoice screen can be used to Print or Email a range of Invoices. In this example the system has filtered all the Pending Invoices for Bill Coffee. Selecting the controls at the bottom of the screen you can now print or email this selection.

The controls for the screen run along the bottom

You can select to Print One or Print All, Email One or Email All – this will only print or email Invoices that are not on hold.
The system will use the default layout for printing or emailing. This can be changed by selecting the drop down box.
A new Invoice can be created by selecting New, an individual Invoice may be placed on hold or taken off hold by highlighting the invoice and selecting Hold. The entire range of filtered Invoices can also be placed on hold or un-held by selecting the Hold ALL or U/Hold ALL buttons.
The Delete option will only be available if the Staff member has the appropriate permission level. Posted Invoices cannot be deleted.
The Profit and Margin will also only be available if the user is allowed to see costs on the Invoice.
The Swap To function will allow the user to take a Pending Invoice for one Customer and then select another Customer to transfer it to. This is only available on Pending Invoices.
The Post 1 and Post All functions will finalise the Pending Invoices that are not on hold. NOTE: make sure that you have printed and or emailed the Invoices before you Post them.
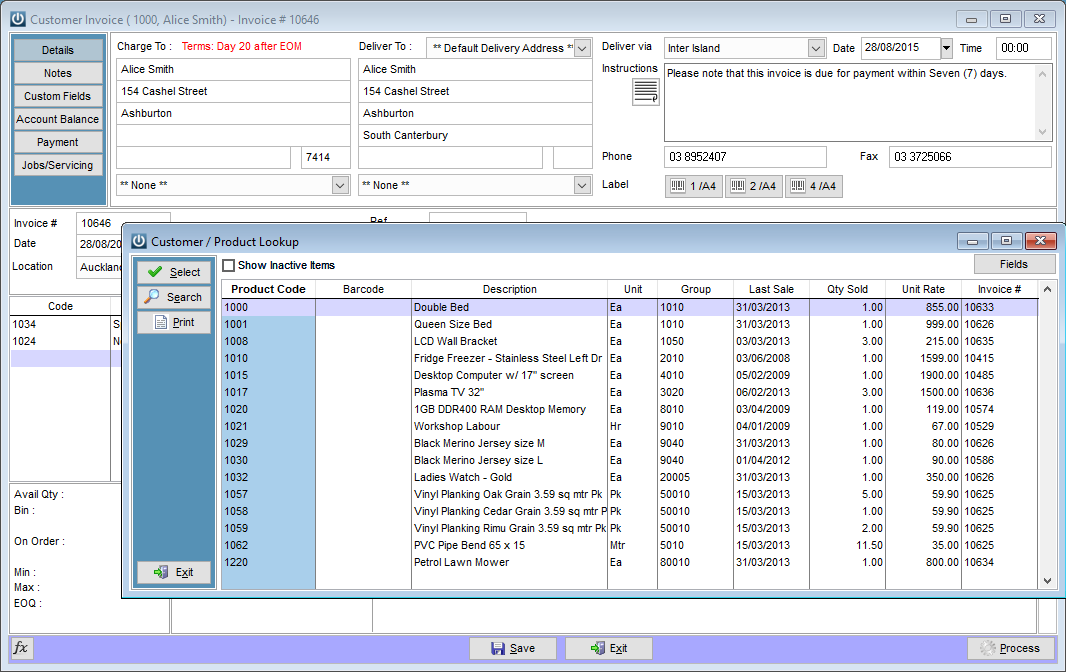
Creating a New Invoice
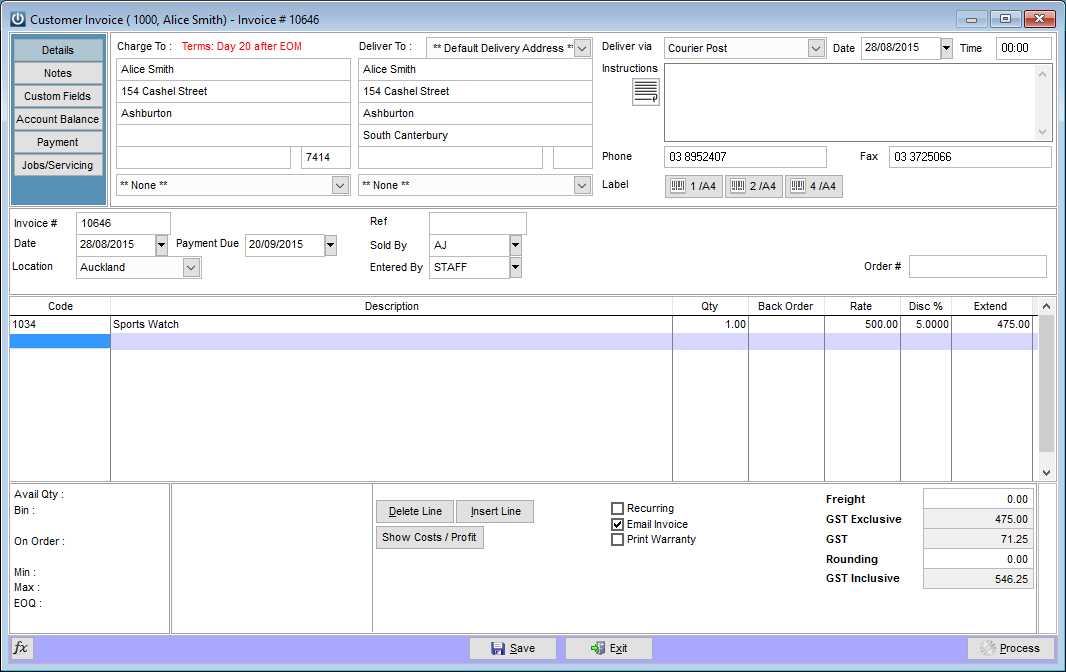
The header of the Invoice Screen contains the Customers Postal and Deliver address details along with the delivery method, date and time. Delivery instructions are also available in the top of the screen.
The Invoice Number field can be set to increase automatically as a new Invoice is raised and is setup in Admin / Defaults / Manage Customer Defaults Manage Customer Defaults/ Invoicing.
The Invoice Date field is the date the Invoice was raised. All Ageing and BalancesBalances will be updated using this date.
The Due Date Due Date is the date payment is due for the Invoice. This is setup under the Terms/Pricing tab for each Customer.
The Ref field is for entry of an Invoice Reference.
The Sold By field is for entry of a staff member’s name and can be forced to be used through Admin / Defaults / Manage System Defaults / Staff Code Required On All Transactions.
The Order # field is for entry of a Customer’s order number.
The Payment Terms for the Customer display in red next to the Customer name
Contact Phone and Fax details can be recorded
Delivery Labels can be printed using the buttons below the phone numbers. There are options to print 1, 2 or 4 times the same label per A4 size page.
Delivery labels can also be pre-set to always print delivery labels at the time of Saving or Posting an invoice. This is achieved from: Admin / Defaults / Manage Customer Defaults / Invoices Tab.
Notes Tab
Allows for entry of an Invoice Title and notes relating to the Invoice. – This Information will be printed at the top of the Invoices before the line items appear

Custom Fields Tab
User defined fields. The six text fields and the two date field headings can be defined in Admin / Defaults / Manage Customer Defaults /Manage Customer Defaults Invoice Fields.

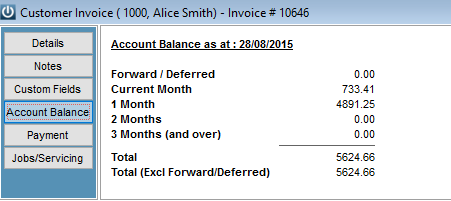
Account Balance Tab
Displays the Aged, Current and Forward dated balances for the Customer.
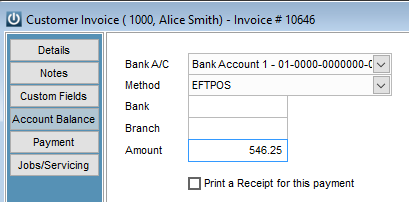
Payment Tab
SetupSetup of Payment Method and Bank AccountBank Account to be received into. See Manage G/L ID from the Financials drop down menuManage G/L Accounts for setup of Bank Accounts.
Banking Methods relate to how the Invoice is being paid e.g. Cash, Cheque or Direct to Bank are the system defaults. Additional Payment Methods can be set up in Admin / Settings / GL Cashbook / Manage Banking Groups.
If a Customer is setup as Cash Only Sales,Cash Only Sales then the full amount of the Invoice is required and is entered into the Amount field. A payment greater than the amount Invoiced cannot be made.
A receipt can be printed out for the sales by selecting the Print a Receipt for this payment option.
If activated under Admin / Defaults / Manage Customer Defaults, Deferred Payments can be set up for the Invoice under the Setup Deferred Payment tab. These can be setup up as either Regular payments or Random payments. POS users can not set up Deferred Payments. For Regular payments the following information is entered:
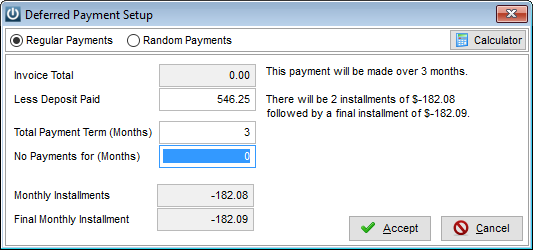
If any deposit is paid on the invoice enter this in the Less Deposit Paid field.
The Total Payment Term (Months) figure is the total number of months the payment is going to be paid over while the No payments for (Months) is the number of months no payments will be made before the first payment is made. With the example above a 6-month Deferred payment term has been chosen with 3 months of no payments so the outstanding amount of $800 (Invoice total less Deposit) will start to be paid off after the fourth month with two payments of $266.67 and a final payment of $266.66.
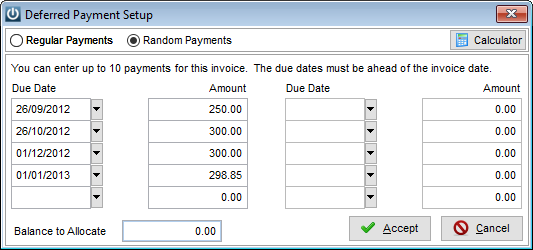
For Random Payments ten payments can be set up to pay off the Invoice. All payments must be dated ahead of the Invoice date and the Balance to Allocate must be zero before the payment schedule is accepted.
The Clear Deferred Payment tab in the payments section allows all information set up for the Deferred payment to be cleared.
Jobs/Servicing Tab

A Job Invoice can be created directly from a Job (see the Job Management section of the Help manual) or from the Invoice screen. To create an Invoice for a Job from the Invoice screen, start as you would when you create a standard Invoice but once in the Invoice screen select the Job/Servicing tab.
Type a Job number in to the Job ID field or select from the drop-down box. Select the Change Detail Settings to change the way each group will be displayed on the Invoice. Select the Invoice detail settings to be displayed for Products, Cashbook, Suppliers and Staff details that appear on the Invoice. These include:
Full Detail – Every line will be displayed individually.
Summary – Only one Summary Line with a Total will be displayed.
Summary by Department – If Departments are set up then a Summary line for each Department will be displayed.
Total – A Total Line will be shown showing a total amount.
Do Not Include – No details will flow through on the Invoice.
Do Not Include - Mark as Billed – No details will flow through however an enquiry will show these costs as being billed.
Select if Actual or Quoted prices are to be billed.
The Preview Invoice button allows a print preview of how the Invoice will look if it was created using the current settings.
Create Invoice will pull the Job Costs through to the Invoice. Once this is done the Costs cannot be edited or deleted from the Invoice.
NB Only Job Costs that have been authorized can be Invoiced.
Items added to a Job Management Invoice will be added back to the Job unless set not to under Manage Job Defaults/Preferences/Don’t adjust Job Costs when editing Job Invoices.
Entering Products onto the Invoice
A list of all Function Keys that can be used in entry of items on to an Invoice are:
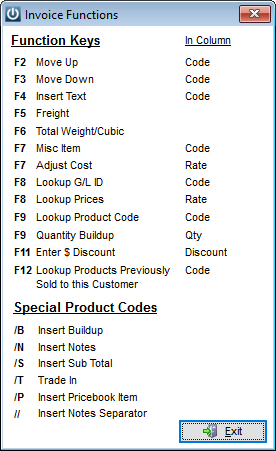
These can be viewed by selecting the Function Key List icon located at the bottom left corner of the Invoice screen.

To enter Product onto an Invoice either:
1) type the CodeCode of the Product into the Code field
2)select the F9 key when the cursor is in the code field
3)scan or type the barcode of the Product in to the Code field.
4)Press F12 to see a list of previously purchased product Codes by this customer
By selecting the F8 key when the cursor is in the Code field a G/L code can be selected. A sell rate will need to be entered for this.
If the Product has been set up to Track Sold Serial Numbers, a window will pop up asking for a Serial Number to be entered. In this case the quantity being invoiced can only be 1, 0 or -1.
If the Product has been setup under the Details section to Allow Multiple Quantities for a serial Multiple Quantities for a serial number a single serial number will be requested for the entire number of items per line.
If there isn’t sufficient Product in stock to fill the Invoice, a warning will pop-up saying of this (if setup in Admin / Settings / Manage Product Product Defaults / Preferences). The quantity of Product not available for the Invoice will be put on Backorder if the Customer is setup to accept backorders (Customers / Terms/Pricing) and Activate Backorders is selected (Admin / Defaults / Manage Customer Defaults / Invoicing).
If the Product has been setup to Stop All All Sales (under Manage Products / Details) a message will pop up stating so. The Product cannot be Invoiced if this is the case.
A discount can be given for each Product line on the Invoice. Entering a percentage figure in the Discount column will reduce the RateRate price by this amount with the full Price showing in the Extended column. A negative percentage discount can be entered. If a Default Discount has been entered against the Customer this value will appear in the Discount column for all items.
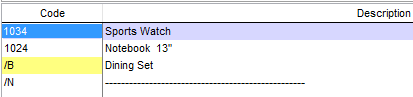
Using /N in the Code column will allow Notes to be added to the Invoice. These will be displayed in the body of the Invoice.
Items can be moved up or down on the Invoice by using the F2 and F3 keys in the Code column.
Using F4 in the Code column allows Custom Text to be added to the Invoice.
Selecting F5 while in the Invoice screen will move the cursor to the Freight field.
Pressing the F6 key will display the combined WeightWeight and VolumeVolume of all Product on the Invoice. This assumes these figures have been setup under the Details section of the Product.
The F7 key will enter the “Misc” Product code into the CodeCode column.
Using F7 while in the rate column will allow the Cost of the item to be changed.
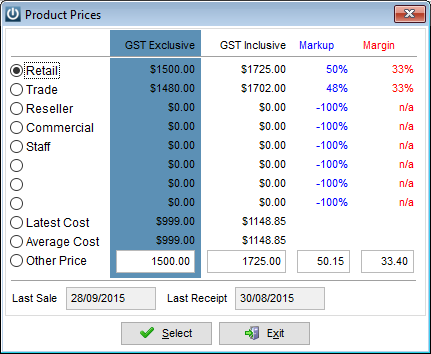
By selecting the F8 key when in the Rates column, a list of Prices from the standard Price Levels will pop up. This allows a different Price to be assigned to the Product for this Invoice. Pricing Group Descriptions (the description used for each Pricing Level) are set in Admin / Defaults / Manage Product Defaults / Price Groups. GST Inclusive and Exclusive pricing along with Mark-up and Margin values are displayed for each Price Level shown. The last Sale and Receipt date are also displayed.
Selecting the F9 key when in the Quantity field allows entry of multiple quantities and unit of measure for the Product. These will all sum up to a total that displays in the Quantity field. If this function has been used on the Product line the Quantity field will display grey.

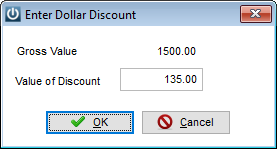
Selecting the F11 key while in the Discount column will allow for entry of a dollar value for the discount rather than a percentage. The dollar value will show as a percentage in the Discount column when it has been entered.
Using F12 in the Code column will show a list of all items previously purchased by this Customer. These can be selected and added to the Invoice.
Using /S in the Code field will Subtotal all of the line items above it not already in a subtotal.
Entering /B in the Code column allows a Buildup Product to be added to the Invoice.
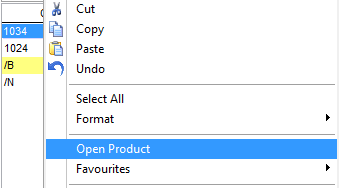
Once you have added a product code to an invoice you can edit the product and change any of the details except the product code. Right Click on the product code and select Open Product

Once you have made your changes the system will prompt you to save them.

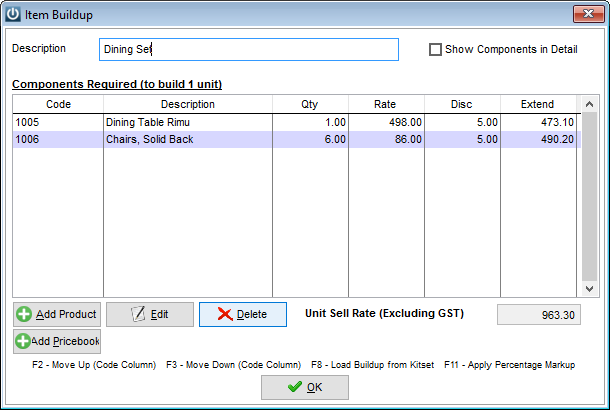
Add a Description to show on the Invoice and add items as required. Alter the Quantity and Rate of each item through the Edit Tab. Selecting F8 will Load Buildup from Kitset. Selecting F11 will allow a Percentage Mark-up to be added to all components (based on Latest cost).
Show Components in Detail will allow all of the components to display on the Invoice (without pricing for each item).
Selecting the Add Pricebook button will allow items from a Pricebook to be added to the Buildup.
Entering /T into the Code column allows processing of a Trade-In on the Invoice. Setup of Trade-Ins is done under Admin / Defaults / Manage Product Defaults / Trade In.
Entering a /P in to the Code column allows entry of a Pricebook item onto the Invoice. See Products / Pricebooks / Manage Pricebooks for set up of Pricebooks.
Entering // will create a line and insert ---------------------------------
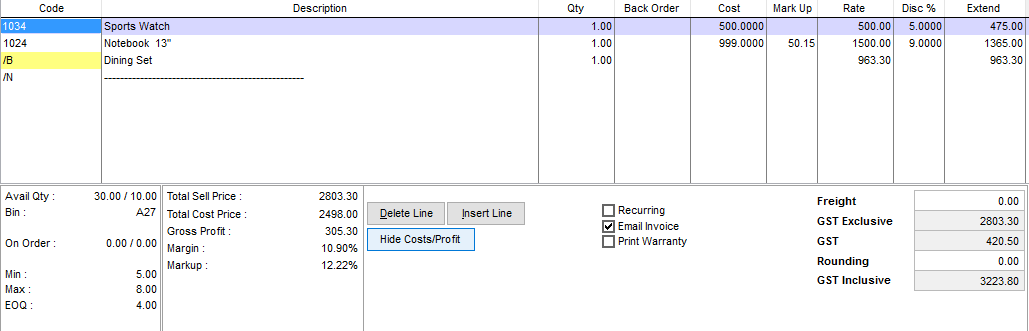
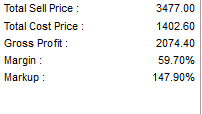
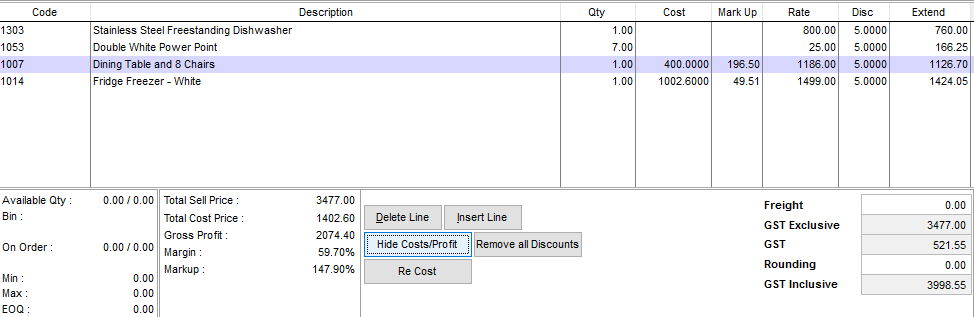
Selecting the Show Costs/Profits will display the Total Sell and Cost for the Invoice along with Gross Profit, Margin and Mark-up. This button will only display if the Hide Costs in Product Enquiry option under Manage Product Defaults / Preferences is selected.

The Cost and Mark-up columns will display the current cost of the line item and the mark-up being achieved. Both of these values can be overridden and used to adjust the final Invoiced price.
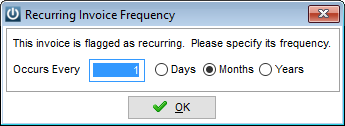
Selecting the Recurring option will automatically recreate the same Invoice again once it has been posted with a new invoice number. The invoice date will be set based on the selected frequency.
Selecting the Print Warranty option will print the details setup under the Warranty layout with the Invoice. To create a Warranty layout, copy the files Warranty.frt and Warranty.frx from the Reports folder to the Custom folder then use the Report/Label Editor under the Help drop-down menu to edit the text.
When a Product line is highlighted the product quantity and associated information is displayed at the bottom left of the invoices screen. This includes
the Available Qty , the Bin Location, The Quantity on order, the Min, Max and EOQ.

Selecting the Save button saves the Invoice as Pending and marks the Product as allocated.
Selecting the ProcessProcess button posts the invoice and fully commits the Product to the Invoice and updates Product and Customer information.
If the Customer is setup with a credit limit and it has been reached, a warning will be displayed at the time of saving or processing the invoice. The warning is based on already posted outstanding balance. It will not take into account existing Pending Invoices.
If a Customer is setup as Cash Sales Sales Only (under the Terms/Pricing tab of the Customer) then a Full Payment is required under the Payments section before the Invoice can be processed.
Manage Quote
The Manage Quotes screen provides a central point of access to all Quotes in the system
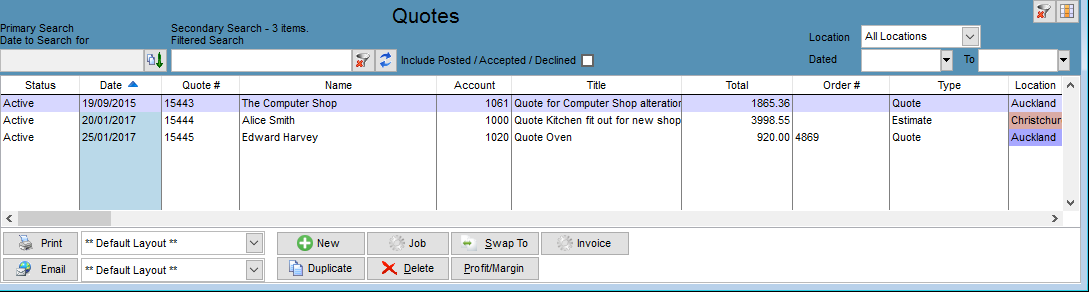
Quotes can be searched and filtered on by a range of fields.
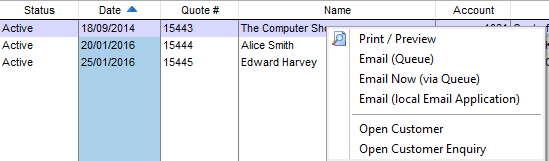
Right Clicking on a quote will allow you to print a copy or email it. You can also open the Customer account or access their Enquiry screen.
Selecting the Include Posted / Accepted / Declined tick box will display all Quotes issued.
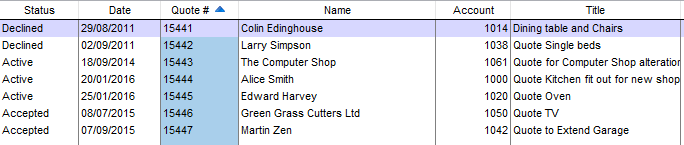
The Status column on the left indicates whether the quote is Active, Accepted (Invoiced or sent to a Job) or it has been declined.
The printing and Email controls are located at the bottom of the screen.

Creating a Quote
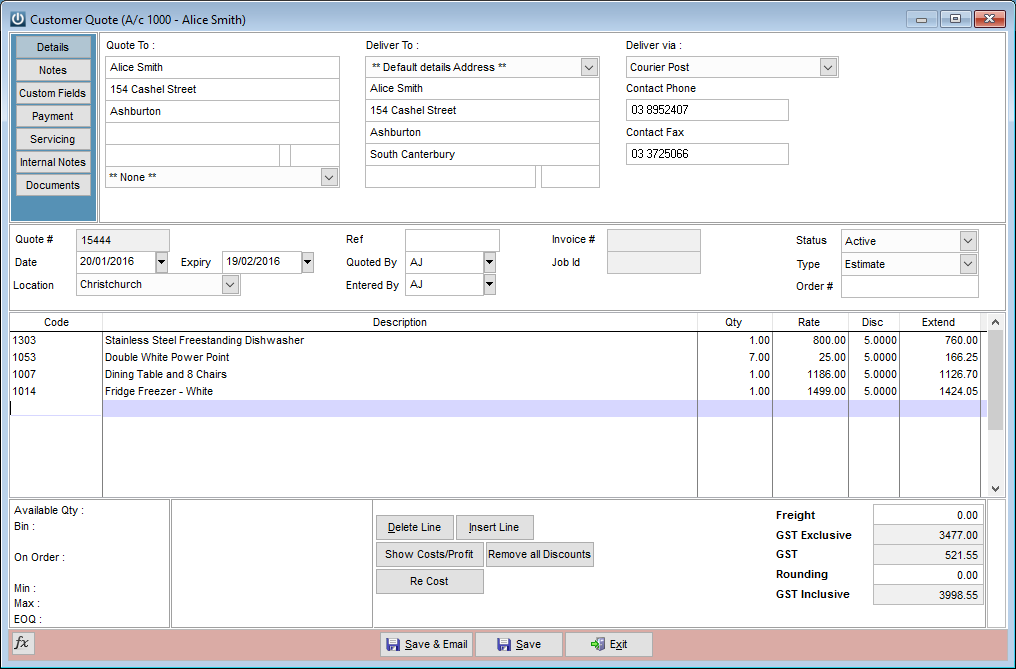
The Details Tab contains the Charge to and deliver to information for the Customer along with the delivery method and contact phone numbers.
The Quote # field can be set to increase automatically as a new Quote is raised. This is set in Admin / Defaults / Manage Customer Defaults Manage Customer Defaults/ Preferences
Details Tab
The Date field is the date the Quote was raised.
The Expiry Date field is setup in Admin / Defaults / Manage Customer Customer Defaults / Preferences as being a number of days after the Quote was raised.
The Location is the location to which the Product will be Invoiced out of if the Quote is accepted.
The Ref field is for entry of a Customer’s reference.
The Quoted By field is for entry of a staff member’s name and can be forced to be used through Admin / Defaults / Manage System Defaults.
The Entered By field allows for recording of who entered the quote details in. Manage System Defaults
The Invoice # and Job ID fields are automatically populated when the quote is transformed into an invoice or job, and only show if opening the form again after this is done.
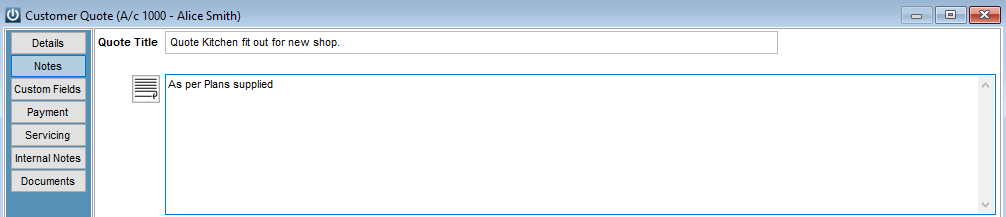
Notes Tab
Allows for entry of Notes relating to the Quote including a Title.
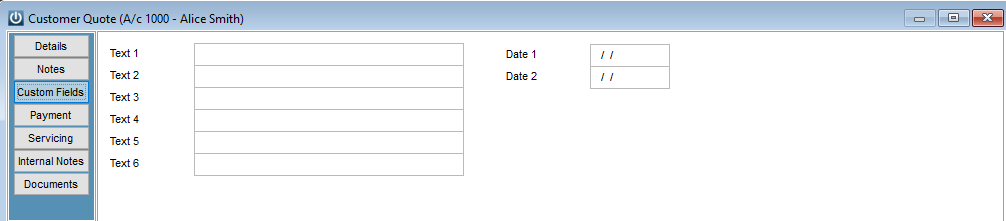
Custom Fields Tab
User defined fields. Defined in Admin / Defaults / Manage Customer Defaults / Invoice Fields.
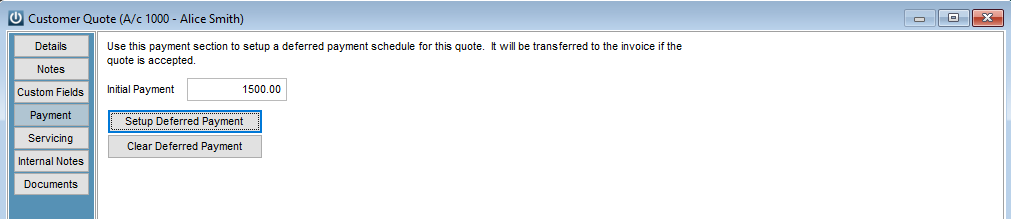
Payment Tab
A Deferred Payment schedule can be set up against the Quote. This is set up in the same way as Invoicing - see Invoices / Payments above for more details. Details for the Deferred Payment will be transferred over if the Quote is converted to an Invoice.
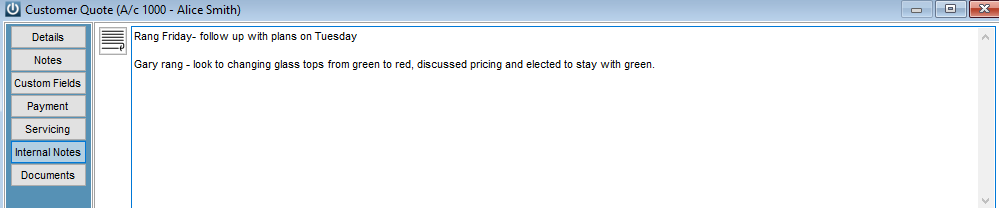
Internal Notes Tab
The Internal Notes tab allows notes and a record of conversation held specific to this quote to be stored and reviewed.
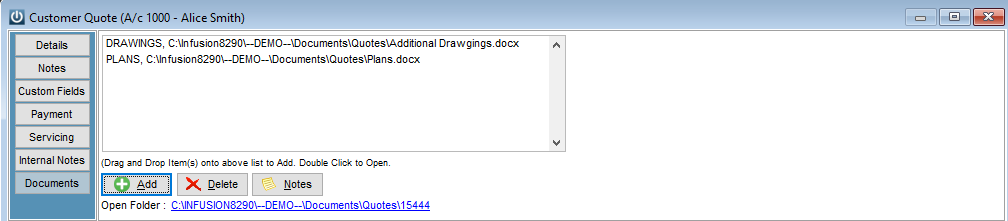
Documents Tab
The documents Tab will allow documents, files and images to be loaded and stored against the quote. These can then be viewed by all staff.
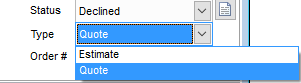
The Quote Status can be changed to track the process the status of the Quote through the sales pipeline

Additional Quote Statuses can be set up under the Admin / Defaults / Manage Customer Defaults / Manage Quote Statuses
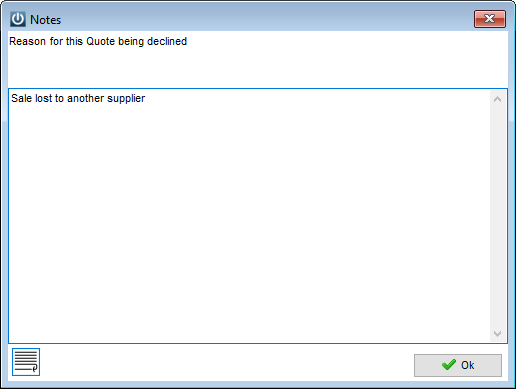
When the Status is changed to Declined the system will prompt you for a reason
The Type of Quote can be changed - the system standard options are Quote or Estimate. Additional Types can be set up if required.
By selecting the F8 key when the cursor is in the Code field a G/L code can be selected. A sell rate will need to be entered for this.
If the Product has been set up to Track Sold Serial Numbers, you will not be required to enter a serial number at this point. If the Quote is converted to an Invoice you will then need to supply a serial number.
If the Product has been setup to Stop All All Sales (under Manage Products / Details) a message will pop up stating so. The Product cannot be Invoiced if this is the case.
A discount can be given for each Product line on the Invoice. Entering a percentage figure in the Discount column will reduce the RateRate price by this amount with the full Price showing in the Extended column. A negative percentage discount can be entered. If a Default Discount has been entered against the Customer this value will appear in the Discount column for all items.
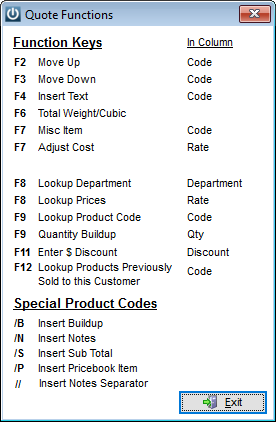
Using /N in the Code column will allow Notes to be added to the Invoice. These will be displayed in the body of the Invoice.
Items can be moved up or down on the Invoice by using the F2 and F3 keys in the Code column.
Using F4 in the Code column allows Custom Text to be added to the Invoice.
Pressing the F6 key will display the combined WeightWeight and VolumeVolume of all Product on the Invoice. This assumes these figures have been setup under the Details section of the Product.
The F7 key will enter the “Misc” Product code into the CodeCode column.
Using F7 while in the rate column will allow the Cost of the item to be changed.
By selecting the F8 key when in the Rates column, a list of Prices from the standard Price Levels will pop up. This allows a different Price to be assigned to the Product for this Invoice. Pricing Group Descriptions (the description used for each Pricing Level) are set in Admin / Defaults / Manage Product Defaults / Price Groups. GST Inclusive and Exclusive pricing along with Mark-up and Margin values are displayed for each Price Level shown. The last Sale and Receipt date are also displayed.

Selecting the F9 key when in the Quantity field allows entry of multiple quantities and unit of measure for the Product. These will all sum up to a total that displays in the Quantity field. If this function has been used on the Product line the Quantity field will display grey.

Selecting the F11 key while in the Discount column will allow for entry of a dollar value for the discount rather than a percentage. The dollar value will show as a percentage in the Discount column when it has been entered.

Using F12 in the Code column will show a list of all items previously purchased by this Customer. These can be selected and added to the Invoice.
Using /S in the Code field will Subtotal all of the line items above it not already in a subtotal.
Entering /B in the Code column allows a Buildup Product to be added to the Invoice.
Once you have added a Product Code to an Invoice you can edit the product and change any of the details except the product code. Right Click on the Product Code and select Open Product
Once you have made your changes the system will prompt you to save them.
Add a Description to show on the Invoice and add items as required. Alter the Quantity and Rate of each item through the Edit Tab. Selecting F8 will Load Buildup from Kitset. Selecting F11 will allow a Percentage Mark-up to be added to all components (based on Latest cost).
Show Components in Detail will allow all of the components to display on the Invoice (without pricing for each item).
Selecting the Add Pricebook button will allow items from a Pricebook to be added to the Buildup.
Entering /T into the Code column allows processing of a Trade-In on the Invoice. Setup of Trade-Ins is done under Admin / Defaults / Manage Product Defaults / Trade In.
Entering a /P in to the Code column allows entry of a Pricebook item onto the Invoice. See Products / Pricebooks / Manage Pricebooks for set up of Pricebooks.
Entering // will create a line and insert ---------------------------------

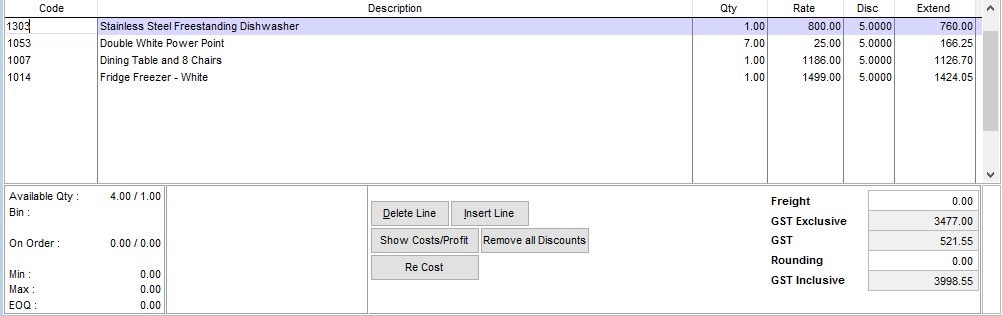
Selecting the Show Costs/Profits will display the Total Sell and Cost for the Invoice along with Gross Profit, Margin and Mark-up. This button will only display if the Hide Costs in Product Enquiry option under Manage Product Defaults / Preferences is selected.
The Cost and Mark-up columns will display the current cost of the line item and the mark-up being achieved. Both of these values can be overridden and used to adjust the final quoted price.
When a Product line is highlighted the product quantity and associated information is displayed at the bottom left of the invoices screen. This includes
the Available Qty, the Bin Location, The Quantity on order, the Min, Max and EOQ.

Selecting the Save and Email button saves the Quote and places a copy in the email Queue.
If you are still working on the Quote then simply select Save and this will save it without creating an email copy.
![]()
- Pending Backorders
A Backorder will only be created if the Customer being invoiced is set to accept backorders (under the Terms/Pricing section of the Customer) and backorders are activated under Admin / Defaults / Manage Customer Defaults / Invoices.
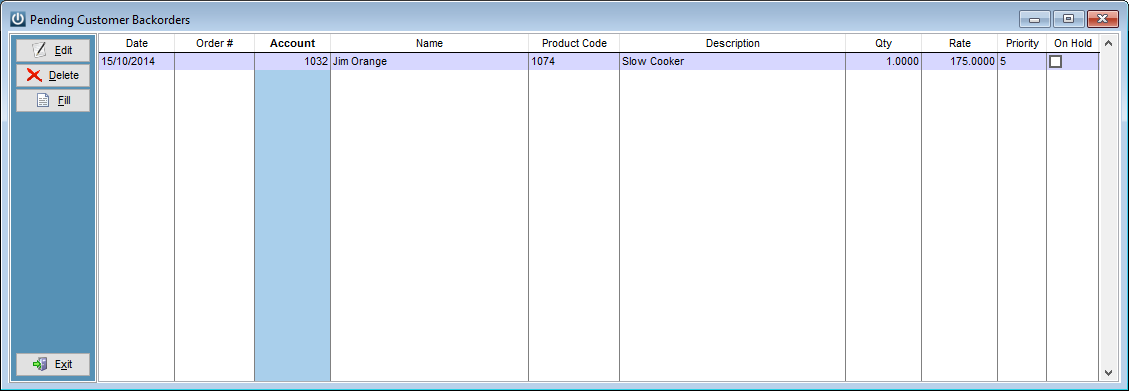
The Edit option allows for the Order#, Quantity, Rate, Discount% and Priority details of a Backorder to be changed. Lower Priority number backorders will be filled before higher numbers.
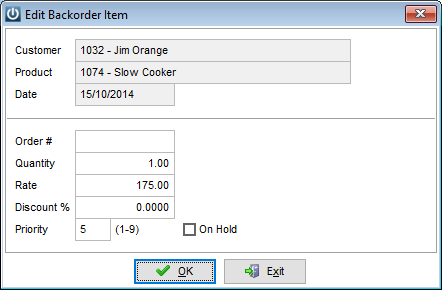
The Backorder can be put On Hold from here. Backorders can be set to automatically be placed on hold by selecting the Admin / Defaults / Manage Customer Defaults / Preferences / Place Backorders on HOLD option.
Backorders can be Deleted from the Pending Backorder screen.
Selecting the Fill option will create a list of orders than can now be filled with current stock holdings.
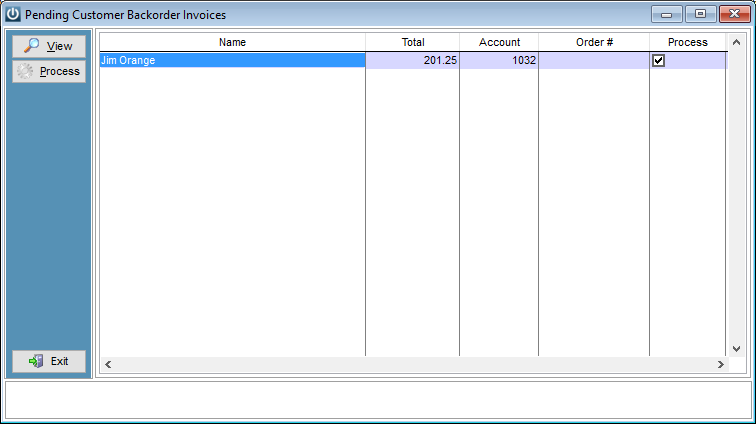
Select View to see a Backorder Preview report. Select Process to create a Pending Invoice for the Customer / Product(s)
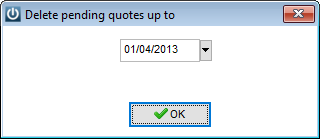
- Delete Expired Quotes
Allows old/expired Quotes to be deleted from the Pending Quotes screen. Quotes with an Expiry date before an Entered date are deleted.
- Credit and Recharge
The Credit / Recharge option allows the user to take an existing Posted Invoice and automatically credit the Customer’s account and if required re-charge to another Customer with the same or different date.

Enter the required original Invoice number and select Credit and Recharge. This will credit the invoice to the original Customer in full (line by line) and recreate another Invoice to a selected Customer with the same line item details.
You can use this option to credit an Invoice to a Customer created on the incorrect date or to credit an Invoice created to an incorrect Customer and recharge it to the correct Customer.
Selecting Credit will create a full credit Invoice with all the line items on it.
The Copy option will create a brand new Invoice for a Customer based on the selected original invoice.
Note This process always creates Pending Invoices; they are not posted automatically.
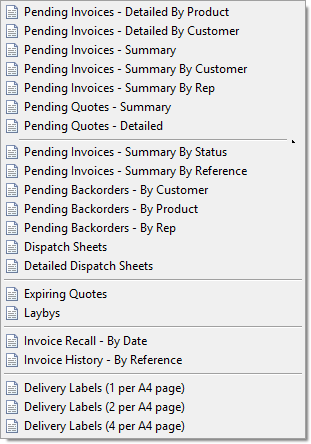
- Reports
Lists a range of reports relating to Invoices and Quotes.