|
<< Click to Display Table of Contents >> Purchase Orders |
  
|
|
<< Click to Display Table of Contents >> Purchase Orders |
|
Purchase Orders
Allows creation and processing of Purchase Orders.
Manage Purchase Orders
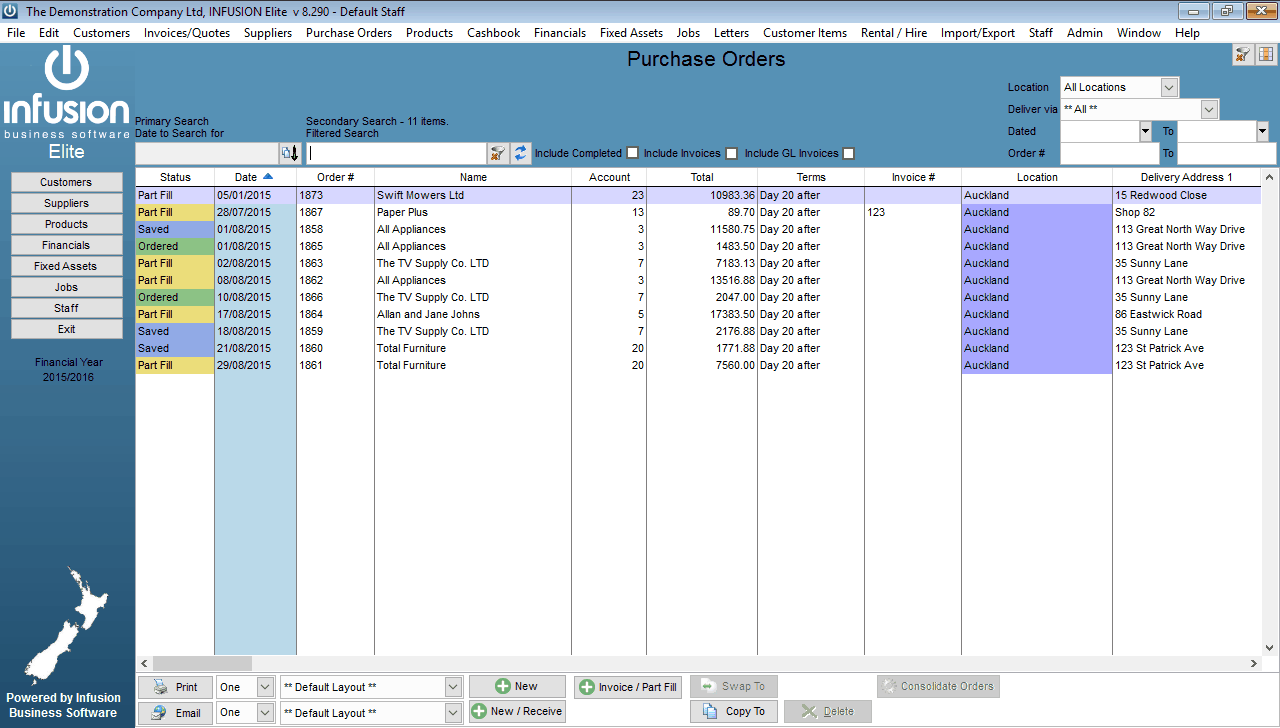
The Manage Purchase Orders Screen
The Manage Purchase Orders Screen provide a central point to create, receive and review the purchase orders.
By default the screen will display all current orders which have been Ordered, Saved, Part Filled, or Fully received.
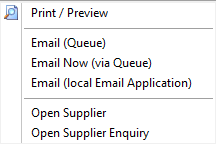
Right clicking on a Purchase Order will give you the options to Print, Email or Open the Supplier to make changes, or open the Supplier Enquiry screen.
Selecting Include Completed will display all purchase orders including those that have been fully receipted.
Selecting Include Invoices will then display the matching GL Invoices for each of the Purchase orders this will now enable you to search for an order locating the order and the matching supplier invoice.

Selecting the Include GL Invoices will now include the invoices loaded against a supplier without products, these are identified as Invoice - GL.

The controls for the manage Purchase orders Screen are located at the bottom of the Screen.

You select to Print or Email One or All Purchase orders. The New option will prompt you to create a new order.
If an order was not created and you need to receive stock in with the order select the New / Receive option.

If the Purchase order has already been part filled or supplied use the Invoice Part filled to process the invoice.
If you have created a purchase order for one supplier, but they can’t supply the products then you can Swap the order to an alternative supplier, this option is only available on Purchase orders that have been Saved or Ordered.
![]()
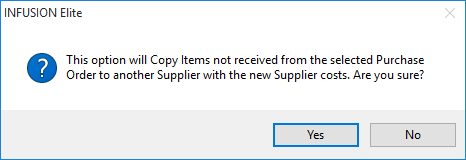
Selecting the Copy to will allow you to replicate an order to another supplier.
Using the Consolidate Orders ![]() will allow you to take all orders to the same suppliers and status and consolidate to one order. Several Staff may have created orders during the day and saved them. The Consolidate option will combine all orders saved into one order.
will allow you to take all orders to the same suppliers and status and consolidate to one order. Several Staff may have created orders during the day and saved them. The Consolidate option will combine all orders saved into one order.
To create a new order select New.
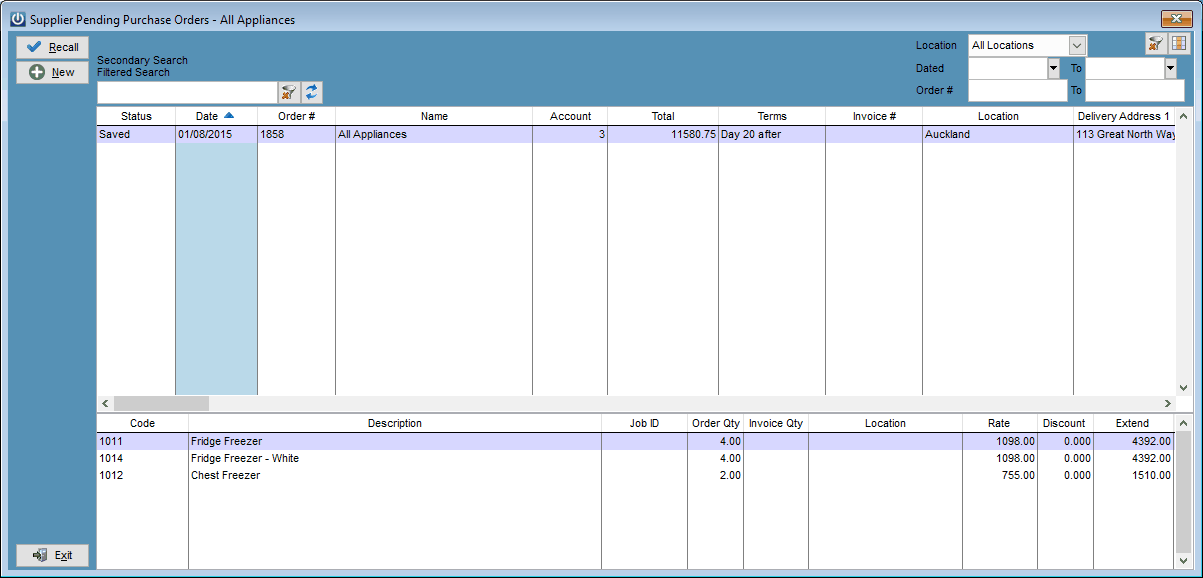
If the Supplier has any Saved orders (i.e. Not Yet Ordered) a list of these will be shown. These can be selected and recalled using the Recall button or a new Purchase Order created by selecting New.
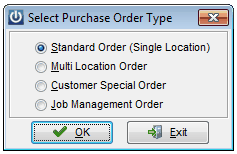
When creating a new Purchase Order, if the software is setup for creation of multiple types, a pop up box will appear requiring selection of a type. These types are setup up under the Admin / Defaults menu and may include as options Standard Order, Multi Location, Customer Special or Job Management Order. Select the required Purchase Order type then OK.
- The Multi Location option will be available if you have multiple Locations set up under Admin / Settings / Products / Manage Locations and Admin / Defaults / Manage Supplier Defaults / Orders / Allow Multi Location Ordering. This option allows for a Purchase Order to be raised on a single Supplier that will be receipted into multiple locations.
- The Customer Special option will be available if set in Admin / Defaults / Manage Supplier Defaults / Orders / Allow Invoicing Direct to Customer. Selecting a Customer under the Customer tab is part of the Invoice entry requirements. An invoice will be created for the Customer when the Product(s) is receipted in.
- The Job Management option will be available if the Job Management module is installed (Service Manager and Elite versions only). This type of Purchase Order will assign a cost to the associated Job when the Product is receipted in. If a Supplier Invoice relating to the Purchase Order has a different value on it than a Packing Slip the costs on the Job will be updated when the Invoice is processed.
- The Standard Order option will not be available if the option Admin / Defaults / Manage Supplier Defaults / Orders / Require Job ID on all Orders is selected.
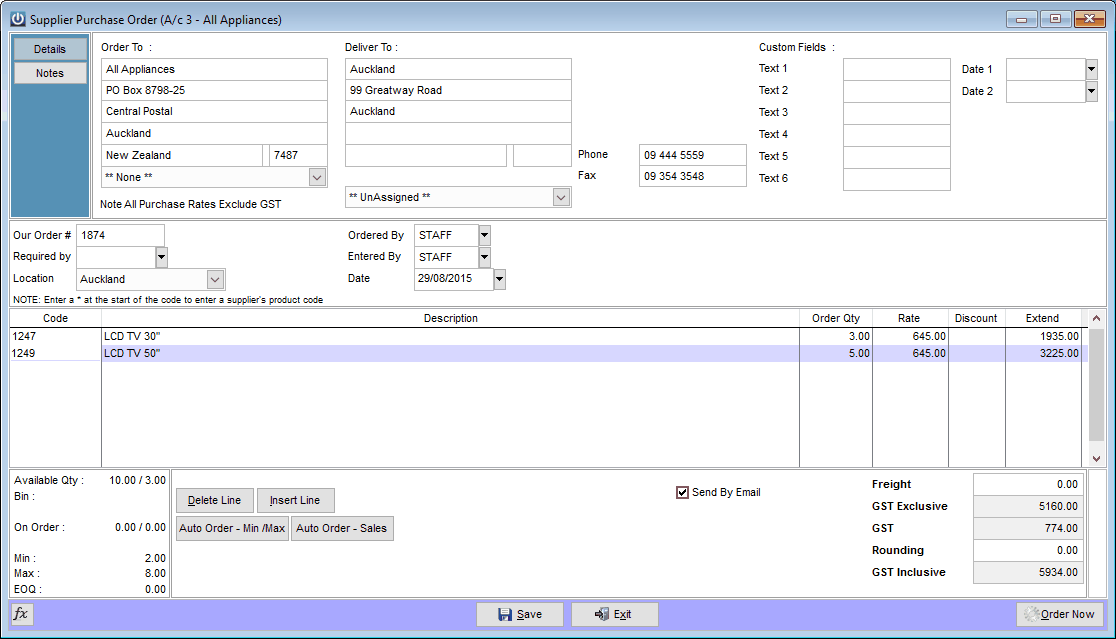
Details Tab
The header of the purchase order will contain the supplier details, your requested delivery address and the Custom fields.
A new Our Order # will automatically be generated for each order. This can be overwritten if allowed under Manage Suppliers Defaults / Preferences.
The Required Date is the date the Products are required.
If there are multiple locations, a Location the goods are to be receipted in to can be set. Changing this will change the delivery address details in the Deliver To field to that of the corresponding Location.
The Ordered By / Invoiced By field is for entry of a staff member name.
The Entered By is the staff member who processed the Purchase order.
The Date field is the date the Order was raised. All Ageing and Balances will be updated using this date.
Notes Tab
Allows for entry of notes relating to the Invoice. An Invoice Title can also be entered.

Customer Tab
This will only be present if it is a Customer Specific Order. It allows entry of the Customer’s details – to be used when Product is receipted in and an Invoice is created.
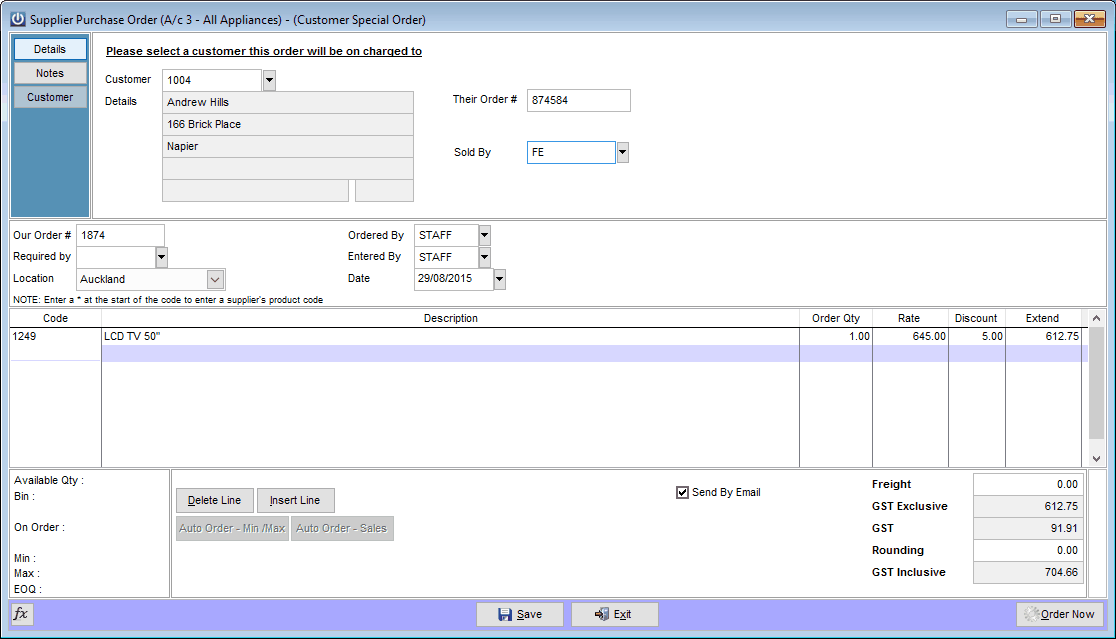
Entering Products onto the Purchase Order
To enter Product onto a Purchase Order either:
| 1) | type the Code of the Product into the Code field |
| 2) | select F9 when in the Code field |
| 3) | scanning or typing the barcode of the Product into the Code field. |
| 4) | typing an “*” then the Supplier’s code (set up under the Product). |
Selecting the Function Key List will display all of the Function Keys and Special Codes available to be used when entering in data into the Purchase Order screen.
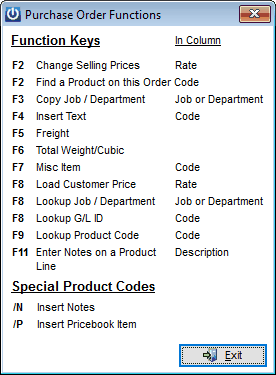
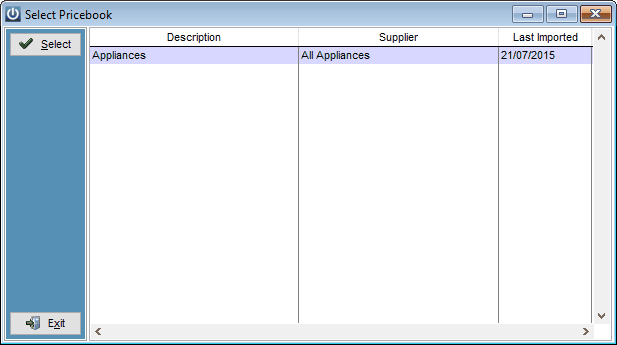
An item from a Pricebook can be entered onto the Order by typing in /P into the Code field. A Pricebook for the Supplier will need to be selected then the Product being ordered. If the Pricebook item has been associated with a current Product Code (see the Products help manual for this) the current product Code will be used on the Order when Order Now is selected. If this hasn’t been set then a pop up window will display indicating that a new Product Code is going to be set up for the Pricebook item. By default the new Code will be the same as the Pricebook code but this can be changed.
If the Product has been setup to Stop All Sales, a message will pop up stating so. The Product cannot be purchased if this is the case.
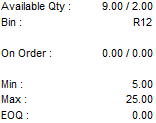
The product information box at the bottom left of the screen will display the current stock holding for the product code, along with the Bin Location Min and max levels and the EOQ.
The Auto Order – Min / Max Auto Order button allows creation of a Purchase Order for all Product that can be bought from the selected Supplier. Only Suppliers setup against the product under the Supplier tab will be evaluated for ordering. The Minimum and Maximum levels setup against the product under the Locations tab dictate whether and how many of each product will be ordered. If the quantity of Product in stock is less than the Location Minimum then an order will be created. The amount ordered will be a quantity that will bring the stock holding up to the Location Maximum.
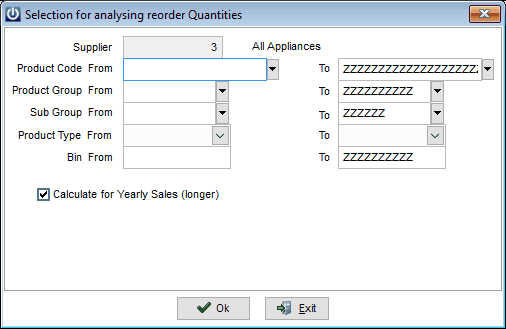
The Auto Order – Sales buttons allows the creation of a Purchase Order for all Product that can be bought from the selected Supplier. The order will be calculated based on the qty sold over entered date range.
You can select to calculate your order bead on yearly sales.
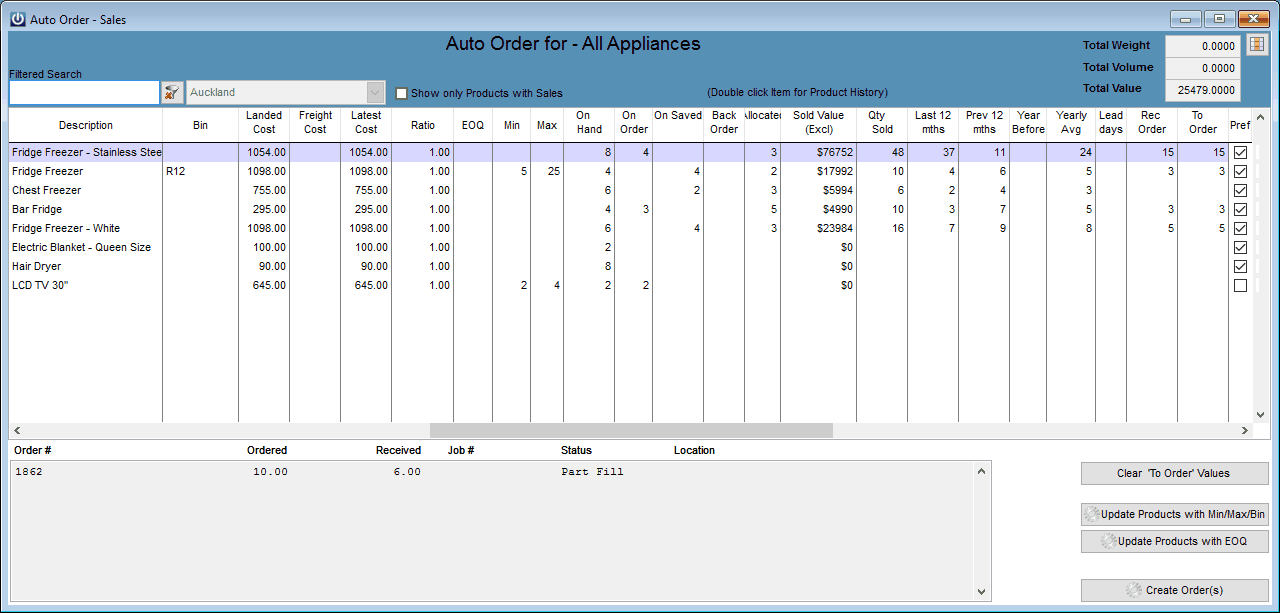
Note - The Screen is wide and contains a lot of information.
The Product Code, Description, Bin location along with the Landed Cost, Freight Cost and Latest Cost are followed by the product Ratio EOQ Min and Max Product Holdings.
The On hand On Order Back order and allocated quantities are then displayed
The next section then displays the Total net sales and the Qty Sold over the past three years. This is followed by the Qty Sold in the last 12 months, previous 12 months and then the total sold in the previous year to this. Providing you with a sales history over the past three years.
This is then followed by the yearly average and the lead time for this product line.
The system will then produce a figure which it considers is the recommended qty to order.
You can amend the qty to order by changing the to order value.
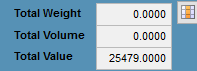
The Top Right of the screen will display the Total Weight, Volume and Value of the order - this information is very useful for managing shipping containers vs product ordered.
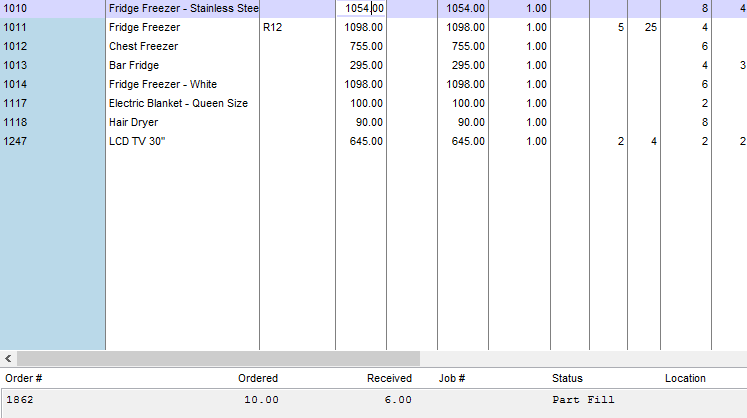
The bottom left of the screen will display any items already on a purchase order.
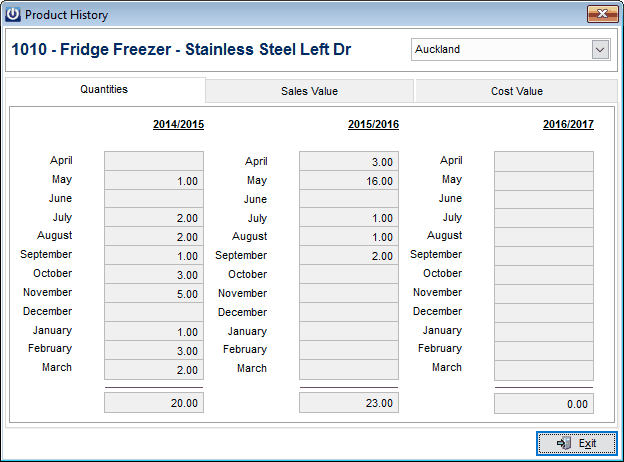
By Double Clicking on any of the product lines on this order screen you will be able to see the sales history for the three years.
Exporting the order to Excel.
Selecting the fields button from the top right of the screen you will now have access to the Excel export.
Selecting this will export the entire screen to excel , the order can now be worked on independently of your system and later imported when you are ready.

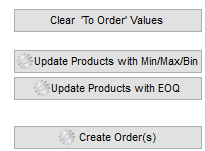
The bottom right of the screen provides a number of options
1, Clear all the to order value.
2, You can also use this screen to set up the up or change any of the min / max values, selecting Update products with min / max values will apply any changes made on this screen to the product record.
3, The screen can also be used to set the EOQ values.
4, Once you are happy with the quantity to order select create order(s) this will then bring all the details back onto the purchase order form ready to review and send to your supplier.
Selecting the Save button saves the Purchase Order as Pending. These can be viewed by selecting the Pending Purchase Orders or Create Purchase Order from Suppliers drop down menu then choosing the same Supplier.
Selecting the Order Now button processes the Purchase Order and updates Product and Supplier information.
Select a “Grouped By” print layout to have the Location the Product is to be delivered to displayed on the Purchase Order.
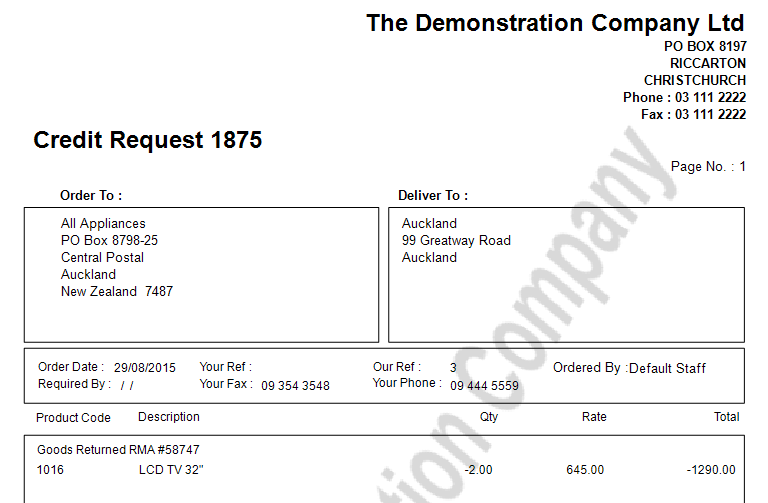
Returning Goods to a Supplier
The same process to create a purchase order should be used, however the quantity should be changed to a negative value to match the quantity being returned.
Use the notes field to add additional information as to the reason for the return.
The Order should then be Ordered, rather than saved, this will then reduce the available quantity to sell, and record against the suppliers account that you have a pending credit.

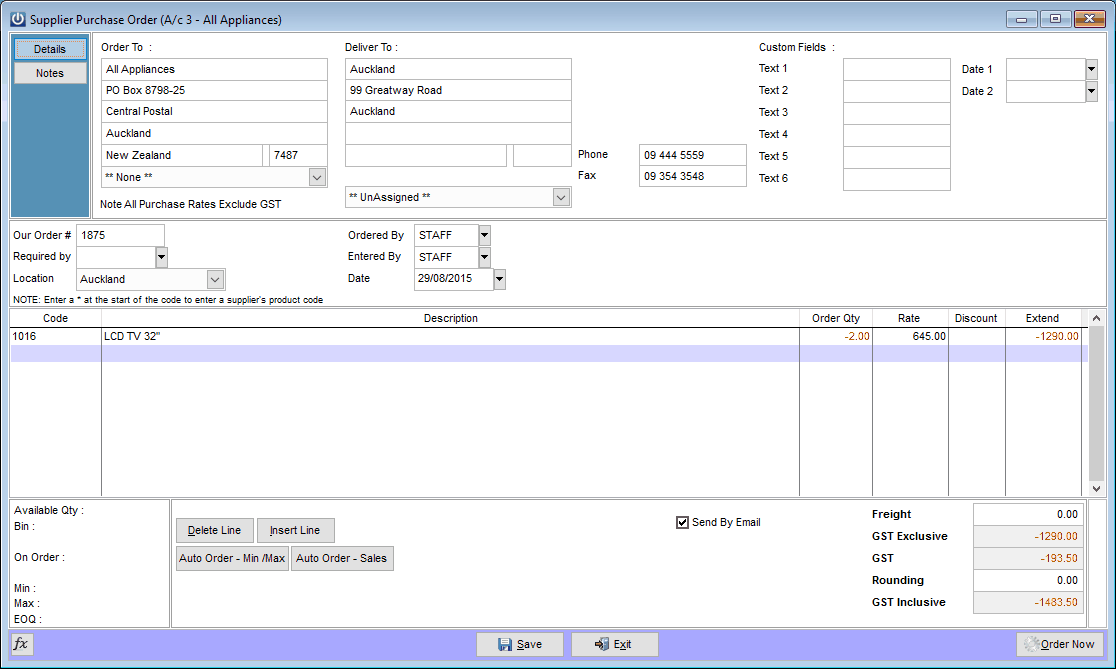
The heading on the purchase order will automatically change to a Credit request.
Receive Products (From Order)
From the manage purchase orders screen locate the desired order and double click.
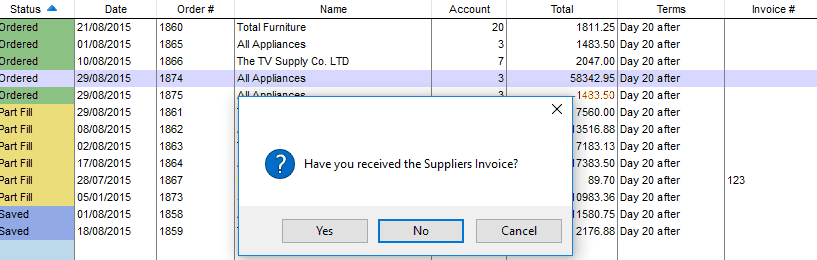
You will now be given the option to receipt the goods in with or with out an invoice. - The permissions to do this are set up against each staff member under their login tab.
If you select 'No', then you will be able to receive the goods in from a packing slip, the purchase order will then change status to Part or All received.
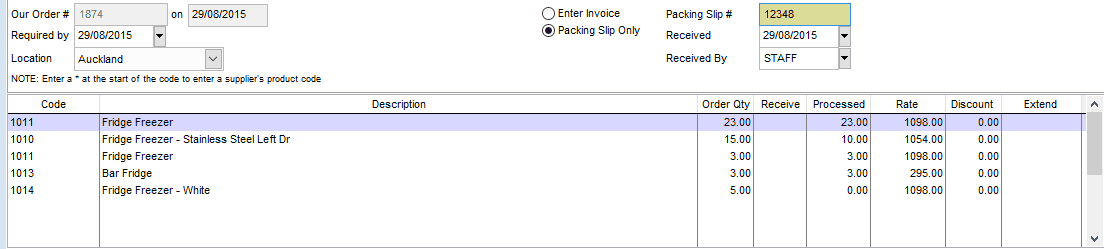
Selecting 'No':
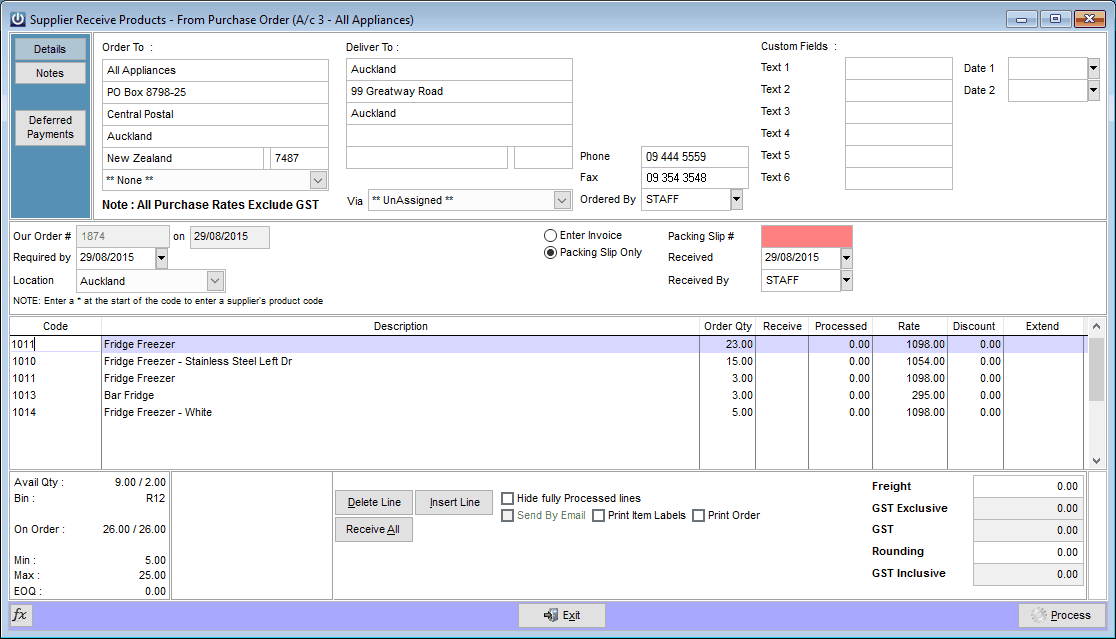
The system will require a packing slip number to be supplied, then in the received field enter the quantity of each line item received. If the order has been received in full then you can select the receive all from the bottom of the screen.

Once the Line items have been updated select process.
Select the Print Labels option to print labels when receipting in goods.
For a Job Management order with a Product assigned to a Job, highlighting the line will display the Job Title, Description and Customer in red.
To receive items in, enter the quantity of goods being received into the Supplied column. If this is a multi location Purchase Order, ensure Product is being receipted into the correct location. Make alterations to the Rate if required.
From the Function Key List.
Selecting the F11 key when in the Supplied field allows a specified number of labels to be scheduled for the Product selected.
Selecting the F12 key will allow apportioning of Freight costs over the Products on the Purchase Order. Note - This can be done when processing the Packing Slip or Supplier Invoice.
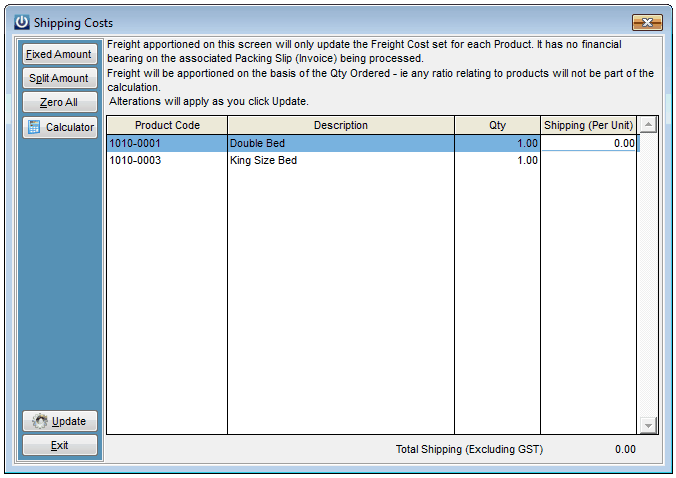
These costs will not affect the value of the Packing Slip or Invoice. Use the Fixed Amount option to allocate a fixed Freight Cost per unit on the order. The Split Amount option will split a known Freight Cost over all units on the Order. Alternatively a Freight Cost can manually be entered for each item. A calculator is available to help with this. Selecting the Update button will update the Latest Shipping Cost for the Products.
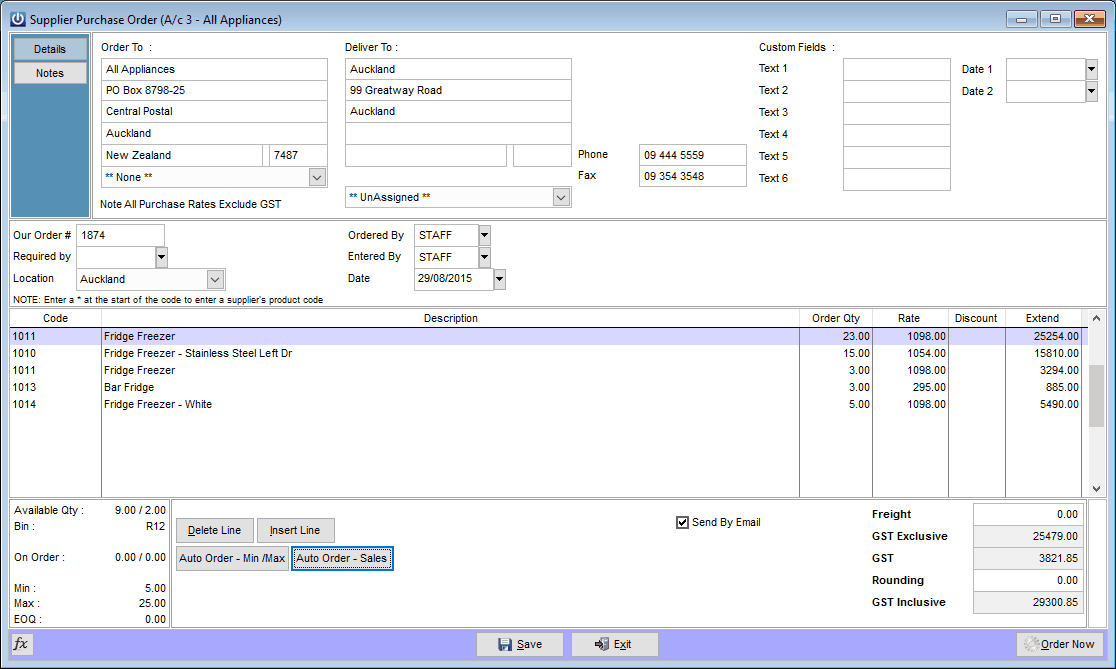
As we have not fully received Order 1874 From All Appliance it now displays in our Manage Purchase orders Screen as Part Filled.
Once the rest of the order arrives on a second packing slip we should again double click on the order.
The processed column now shows us the quantities previously processed, the next packing slip quantities will be entered into the receive column.

The Status of the order has now changed to All Received indicating that all the goods have been supplied, but the invoice has not yet been processed.
![]()
When the suppliers Invoice arrives, From the Manage Purchase orders screen, locate the order and double click.
The system will now open up the the Supplier Invoice Screen and Automatically add the receipted Packing slips that relate to this order to the invoice.
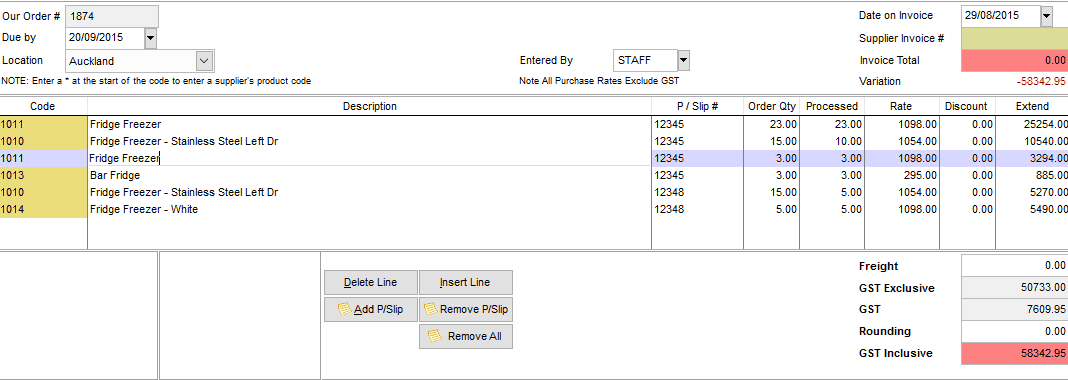
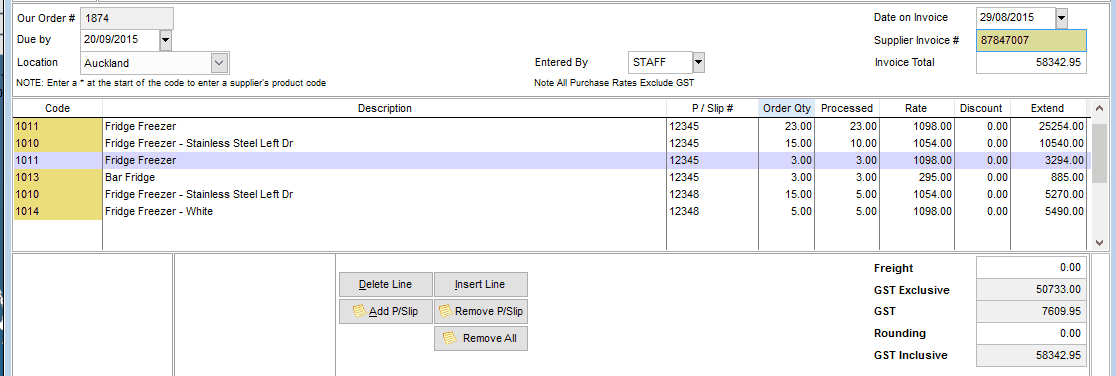
The Supplier Invoice number is a required field, the Invoice cannot be processed without it.
The Invoice Total field needs to be manually entered by the user, this ensures that the line items entered balance and agree with the invoice supplied. Any variation will display in Red until the lines or total are corrected.
As the goods have come form several packing slips, the packing slip number is displayed in the body of the Invoice.
One the Invoice balances and the suppliers Invoice number has been entered you will be able to process the Invoice.
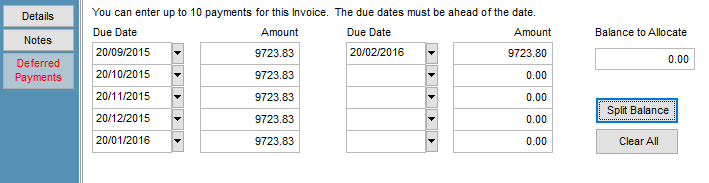
Deferred payment terms can be entered at this point.
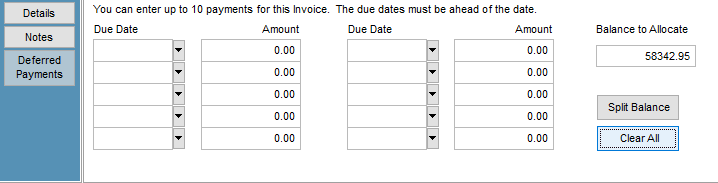
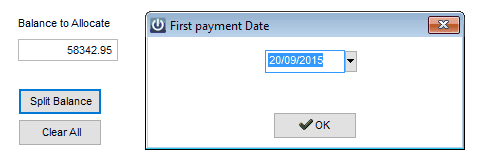
Selecting the Deferred payment from he top left of the screen will allow you to manually set the date and amount of each payment for this invoice.
These values will show as deferred on the Suppliers ATB reports until they become due.
Otherwise if the invoice is to be split evenly over a number of months.
The Function Key list for Receiving Supplier Invoices is:
And then the number of months:
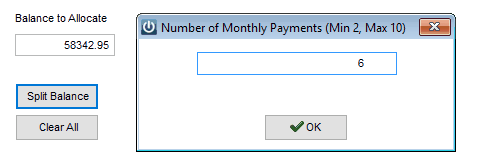
The system will then calculate the payments and then their due date.
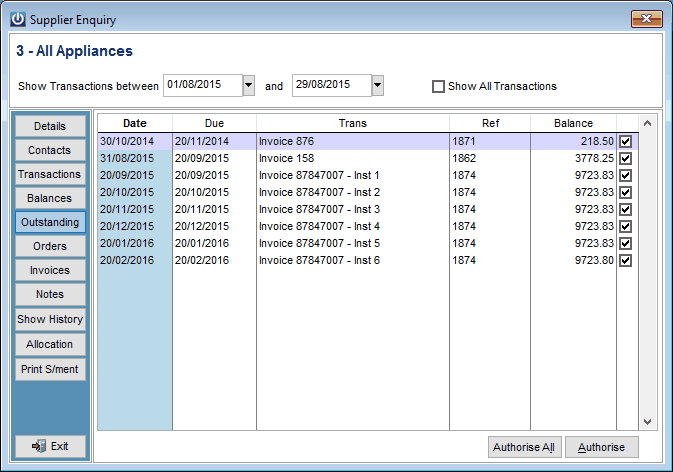
Once the Supplier invoice has been processed, an enquiry on the supplier account will show the Invoice outstanding as followed.
Reports