|
<< Click to Display Table of Contents >> POS |
  
|
|
<< Click to Display Table of Contents >> POS |
|
POS
Before processing Sales through POS the POS Defaults need to be setup. This is outlined in the following subsection.
POS Defaults
Select the POS / POS Defaults.
Preferences
Setup of various POS specific preferences.
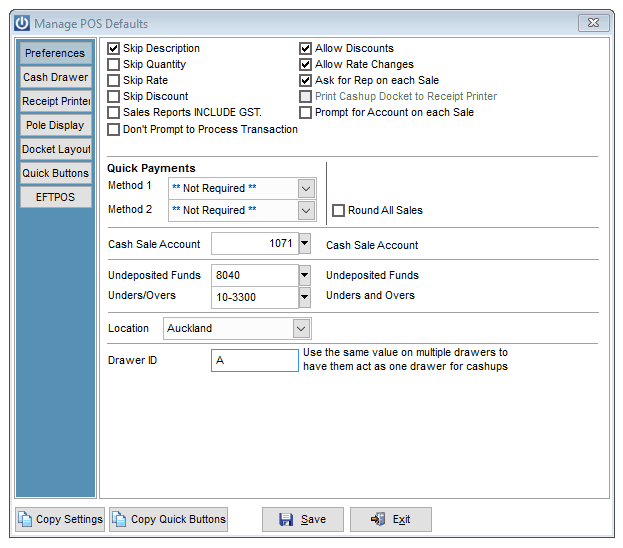
The following four fields are mandatory and must be completed before you can process a POS Sale.
| 1. | Cash Sale Account. |
| 2. | Undeposited Funds. |
| 3. | Unders/Overs. |
| 4. | Location. |
If Skip Description is selected, when entering Products into a POS Invoice the Description field will be skipped when selecting Enter. You are still able to click on the field or tab into it to change the value if required.
If Skip Quantity is selected, when entering Products into a POS Invoice the Quantity field will be skipped when tabbing across. You are still able to click on the field and change the value if required.
If Skip Rate is selected, when entering Products into a POS Invoice the Rate field will be skipped when tabbing across. You are still able to click on the field and change the value if required.
If Skip Discount is selected, when entering Products into a POS Invoice the Discount field will be skipped when tabbing across. You are still able to click on the field and change the value if required.
Sales Reports INCLUDE GST allows Sales reports to be created that include GST.
Selecting the Don’t Prompt to Process Transaction option will suppress the popup asking for confirmation to process the sale appearing after the payment method is selected.
Allow Discounts allows entry of a discount percentage in the POS Invoice screen. If selected, a “disc” column will appear on the POS Invoice screen.
Allow Rate Changes allows changing of the Rate for products from its standard price. If this is not selected, the contents of the field will be greyed out so it can not be edited.
Ask for Rep on each Sale automatically requests authority for the sale to be processed from a nominated sales representative.
If a Receipt printer has been selected under the Receipt Printer tab the Print Cashup Docket to Receipt Printer option will be available.
Selecting the Prompt for Account on each Sale will mean that for each sale a popup window will appear asking for entry of a customer account the sale is to be processed against.
Quick Methods allow for the addition of up to two Payment buttons on the right hand side of the Screen to activate these you will need to select from one of your pre set payment methods. Additional payment methods may be set up by going to Admin / Settings / GL Cashbook / Manage Banking Groups / Banking Methods. If methods are setup, they will be viewed when processing a Sale. Methods selected here will be given a function key for faster processing.
Select the Round All Sales option will round all sales to the nearest 10 cents not just the sales paid for by Cash.
Cash Sale Account must be set to be able to open POS. This is the account all Cash sales will be charged to. This is also the default account POS will use.
Undeposited Funds and Unders / Overs need a GL ID assigned to them to be charged against. These are required fields.
Location must be set to be able to open POS. If you operate from one location then this should be set to Central. If there are Multiple locations, select the location you are in.
Entering a value in to the Drawer ID field allows consolidation of Cash Drawers. All Cash Drawers with the same ID will be consolidated. The Drawer Contents report selects all Drawers with the IDs the same as that of the draw running the report when 'This Drawer Only' is selected. Cashing Up / Removing a Cash Drawer operates in the same way. The Hourly Sales report still operates on a Terminal / PC by Terminal / PC basis.
Cash Drawer Tab
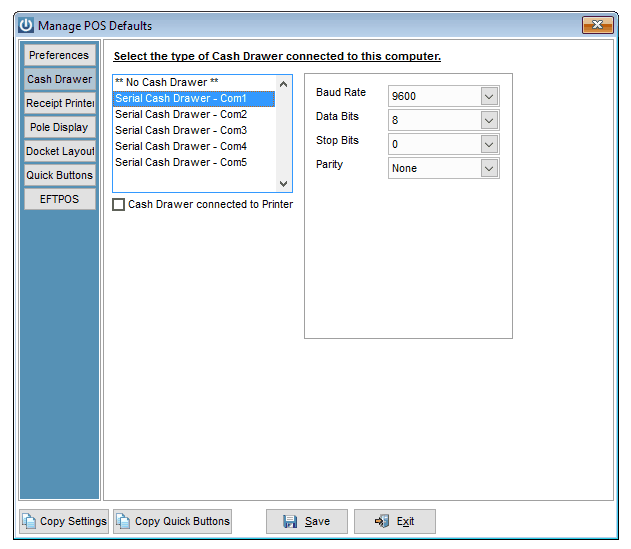
Allows setup of a cash drawer connected to computer. If the cash drawer is connected directly to the computer select the port it is connected through. If the Cash Drawer connected to Printer option is selected as in above a list of available Receipt Printers are shown. If the printer being used is not in the list check how it runs by selecting each of the printers shown. More than likely one of these will work.
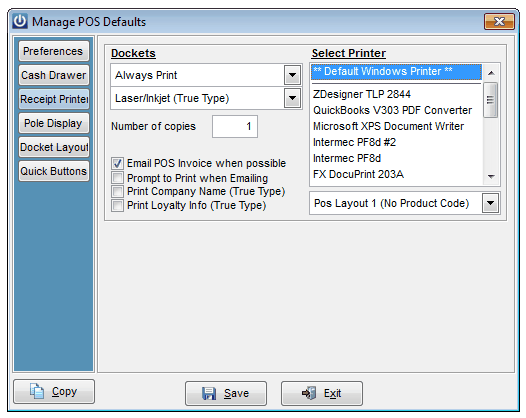
Receipt Printer Tab
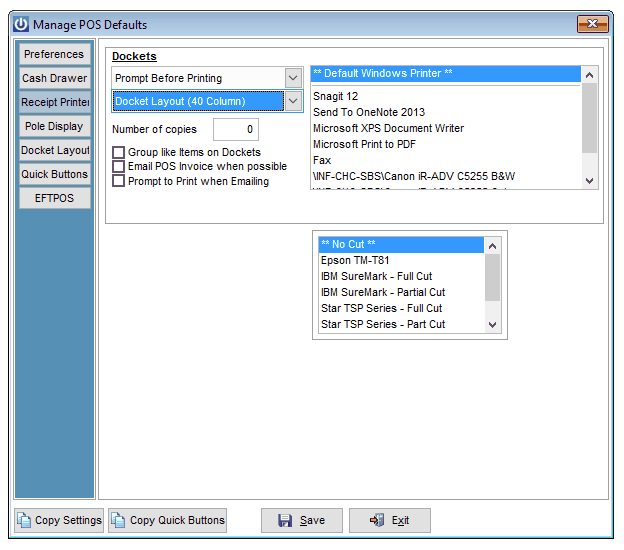
There are three settings for when you would like a docket / receipt to print, Always Print, Prompt Before Printing and Never Print.

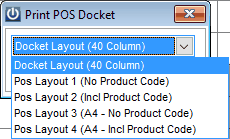
There are also three layout settings for receipt printing No Docket, Docket Layout (40 Column) or Laser / Inkjet (True Type). The Docket Layout selected determines the settings which need to be setup.
The option to Group like Items on Dockets allows Products with the same Code, Rate and Discount to be consolidated into one line.
If emailing Invoices has been set up under a Customer and Email Defaults the Invoice can be emailed when the Email POS Invoice when possible option is selected.
The option to print an Invoice after it has been emailed is available if the Prompt to Print when Emailing is selected.
When Laser / Inkjet (True Type) layout is selected the POS Layout to be used needs to be selected.
If emailing Invoices has been set up under a Customer and Email Defaults the Invoice can be emailed when the Email POS Invoice when possible option is selected.
The option to print an Invoice after it has been emailed is available if the Prompt to Print when Emailing is selected.
Whether or not a Company Name or Loyalty Information is printed on the docket can be set. There is also the option to Group Like Items on a Docket. Selecting this will consolidate multiple lines of an item on to one line.
For both True Type and 40 column docket layouts the appropriate Windows driver needs to be selected from the Select Printer section.
Pole Display Tab
Open Message and Close Message fields allow you to enter the message you would like displayed when POS is open and closed. A port the Pole Display is connected to needs to be specified.
Docket Layout Tab
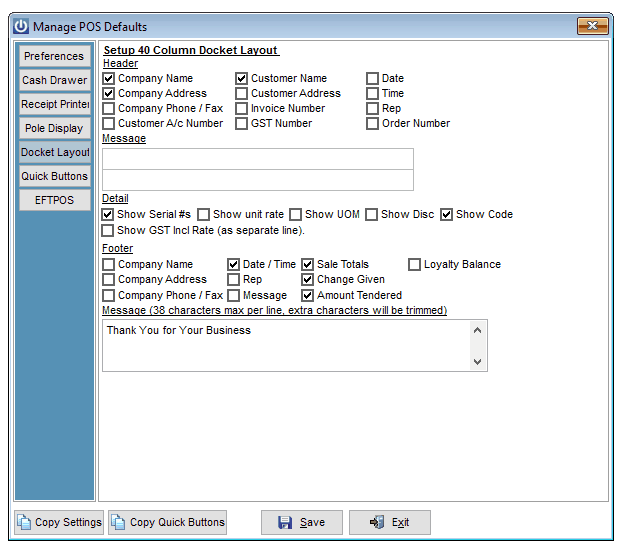
Allows setup of the information to display on a docket when printed from a docket printer.
The options are split into three sections Header, Detail and Footer. Message is the Text that will appear at the bottom of the docket. – Please Note that each line of text should be no more than 30 Characters in length.
Quick Buttons Tab
From the Quick Buttons tab 20 button can be configured for use on the POS screen
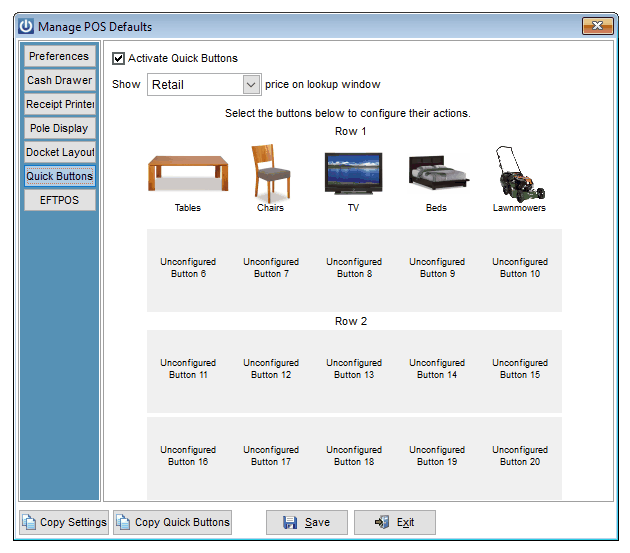
These buttons will display at the bottom of the POS screen and can be selected by either clicking on them or being used with a touch screen.
To activate this option first select the Activate Quick Buttons tick box. Next select the Price Level to show on the buttons from the drop down box.
Selecting the button to be configured will display the setup screen.
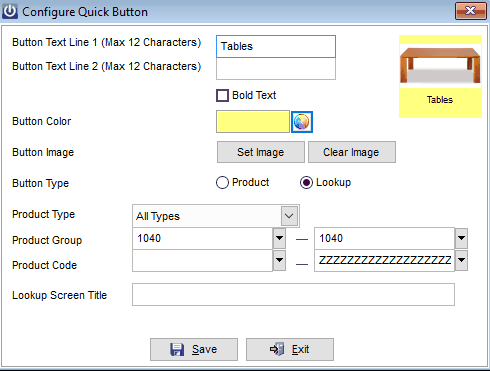
Two lines of text can be entered to display on the button. It can also be configured to a fill colour by selecting the display box and choosing from the palette. Remove the colour by selecting the Reset button.
An image can also be set to display on the button.
The button can be set to either be a Product which when selected will add the item to the POS entry screen and the cursor move to the Code field of the next line. Select the Product from the Product Code dropdown box to set this.
Alternatively the button can be set to display a range of Products by selecting the Lookup radio button. Select the range of Products from the Type, Group and Code options. A title can be set for the popup screen by entering text into the Lookup Screen Title field.
EFT POS TAB
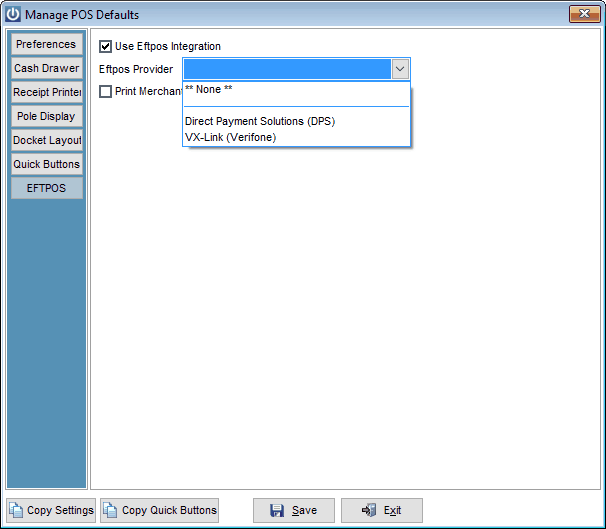
To use the integrated EFT POS functionality with infusion you will require an updated Registration Number, once you have this you can then select from one of the supported vendors.
Please Note that the use of the integrated EFT POS requires the installation and use of a Thermal Docket 40 Column Receipt printer.
The Copy Settings button at the bottom left of the Manage POS Defaults screen allows the settings from another POS user to be copied over to the current user. A Terminal ID needs to be selected to copy from. The Terminal ID of a user can be found on the Help / About screen.
The setup of the Quick Buttons is personalized to the user logged in allowing different staff members to have different buttons based on their needs. You can use the Copy Quick Buttons to copy the setup from one staff member to another
POS Drop Down Menu
Access the POS drop down menu from the top of the screen.
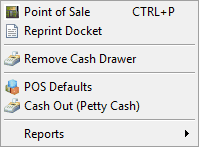
Point of Sale
Opens the main Point of Sale window and allows transaction details to be entered.
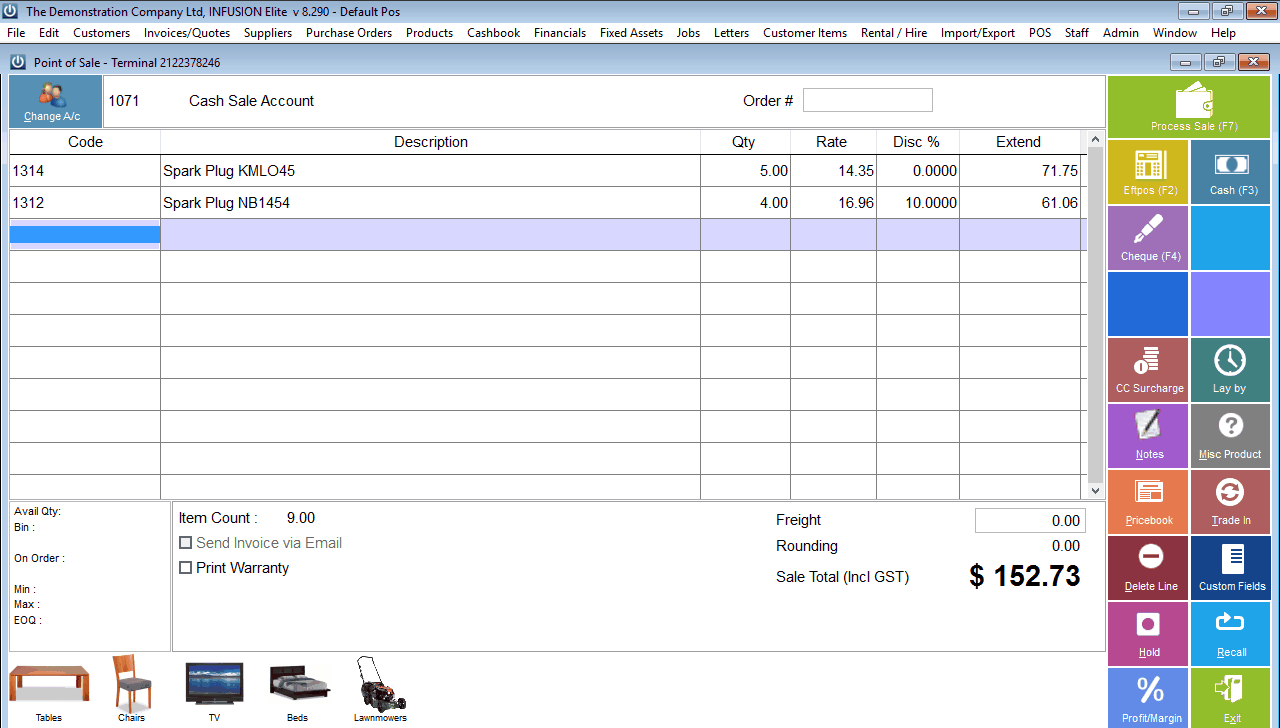
Change A/c allows selection of the Account the Transaction is to go against. These are selected from you current Customer list. Cash Sale is the default account.
The Send Invoice via Email will be available to be selected if an email link has been set up under the Customer’s account to email Invoices.
Order # can be entered if required.
The Rep can be selected by clicking on the drop down arrow.
There are several ways of entering Products onto the screen:
| 1) | Type in the Product Code into the Code field. |
| 2) | Select F9 when in the Code field to look up Products. |
| 3) | With the cursor in the Code field scan the Product’s Barcode label. |
| 4) | The CC Surcharge Button will add a preset percentage to the value of the sale, this should only be used once per sale and at the end of the sale. |
| 5) | The Lay By Button will allow the invoice to be charged against a customer’s account, even if they are set to be Cash Sales Only. |
| 6) | The customers Invoice, POS Docket and Statement can be customized to include the standard Lay By terms and conditions. |
| 7) | The Notes Button will allow the user to add notes to the invoice or select from a range of custom text. |
| 8) | Selecting the Pricebook button from the right hand menu will allow entry of a Pricebook item onto the next available blank line of the screen (or enter /P into the Code field). |
| 9) | Selecting the Trade In button from the right hand menu will allow entry of a Trade In onto the next available blank line of the screen. (or enter /T into the Code field). |
Selecting the Misc Product button from the right hand side menu will enter a Miscellaneous product code into the Code field of the next available blank line. This requires the product code MISC to have already been set up.
The Function Key List for the POS screen is:
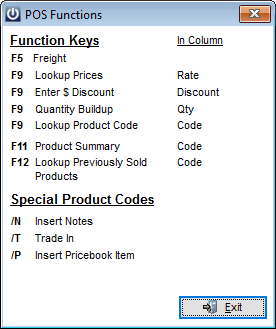
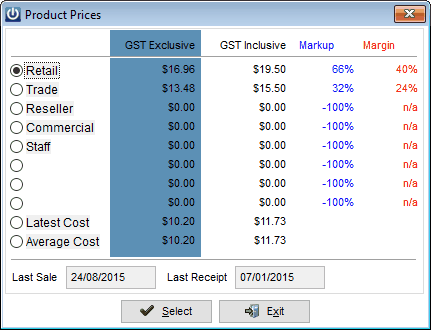
By selecting the F9 key when in the Rates column, a list of Prices from the standard Price Levels will pop up. This allows a different Price to be assigned to the Product for this Invoice. Pricing Group Descriptions (the description used for each Pricing Level) are set in Admin / Defaults / Manage Product Defaults / Price Groups. GST Inclusive and Exclusive pricing along with Markup and Margin values are shown for each Price Level that is displayed. The last Sale and Receipt date are also displayed.

Selecting F9 while in the Disc column (Allow Discounts activated under POS Defaults) will allow entry of a dollar value for a discount. This will still display as a percentage in the in POS screen.
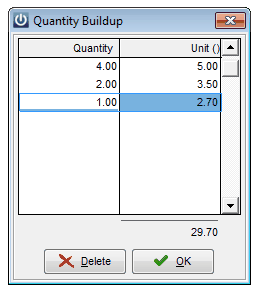
Selecting the F9 key when in the Quantity field allows entry of multiple quantities and unit of measure for the Product. These will all sum up to a total that displays in the Quantity field. If this function has been used on the Product line the Quantity field will display grey.
To see a summary of the details of a Product select F11 while in the Code field. Information displayed includes Quantities On Hand and On Order in all locations along with Bin Location details. A Pricing Enquiry option allows a percentage or sell value to be added to one of the four available fields and the three other corresponding fields will calculate.
Selecting F12 while logged in as a POS user will display a list of items previously purchased by the Customer chosen in the POS screen. - This option is available for all customers except the default Cash Sales Account
If a Pricebook item is entered onto the Invoice (/P) and has been associated with a current Product Code (see the Products help manual for this) the current product Code will be used on the POS invoice when the payment is processed. If this hasn’t been set then a popup window will display indicating that a new Product Code is going to be set up for the Pricebook item. By default the new Code will be the same as the Pricebook code but this can be changed.
The in stock quantity of a highlighted item on the POS screen can be seen at the bottom left of the screen. The Available Qty figure is the in stock value at the Location set against the POS defaults. The in stock quantity at All Locations can be seen along with the Bin Location it is located in at this Location.
If a Warranty document has been set up there is an option to Print Warranty with the sale.
Selecting the Hold button will place the Transaction on hold for the selected Account. A Hold docket can be printed for this transaction. Recall displays all Held transactions for the selected Customer.
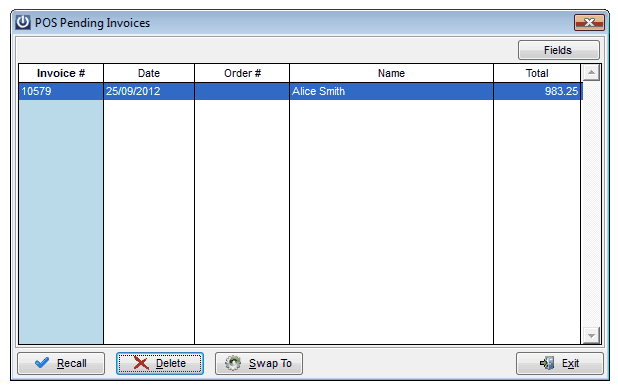
Select the Recall option to recall the highlighted transaction. A Held transaction can be swapped to another Customer by using the Swap To option.
Selecting the Custom Fields button allows entry of data specific to this sale. These fields are set up under Admin / Defaults / Manage Customer Defaults / Invoice Fields.
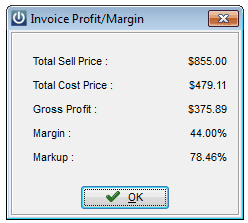
Selecting the Profit / Margin button displays the Total Cost and Sell Price for the transaction along with Gross profit, Markup and Margin. This will not display if the Hide Costs in Product Enquiry option under the Manage Product Defaults / Preferences menu is selected.
Processing Payment of a Sale
To process a sale select the Process Sale (F7) button from the right had side menu. This will allow entry of multiple payment methods.
If a single method of payment is being used the EFTPOS (F2), Cash (F3) and Cheque (F4) options can be selected.
If the Customer has an account the **Charge to Account** and **Deferred Payment** options will display. If the Deferred Payment option is used a schedule will need to be set up. See the Invoices / Quotes Help manual for more detail on this.
Selecting the OK button from the Process sale screen will display a summary of the transaction with the Invoice total, the payment method (or “Multiple” if multiple payment methods were used), any change due and the invoice number.
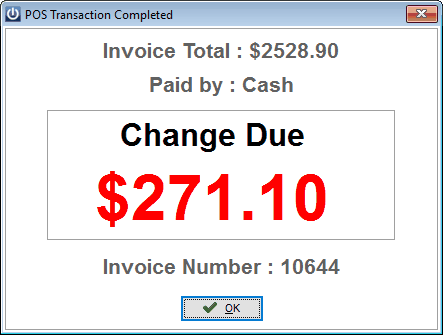
Select OK to confirm the sale. If this screen is left for 10 seconds it will automatically process.
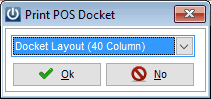
If you have set the POS Invoice to Prompt before printing then you will be presented with the option to select either from the range of both Docket and Laser Layouts. Or No for no printing.
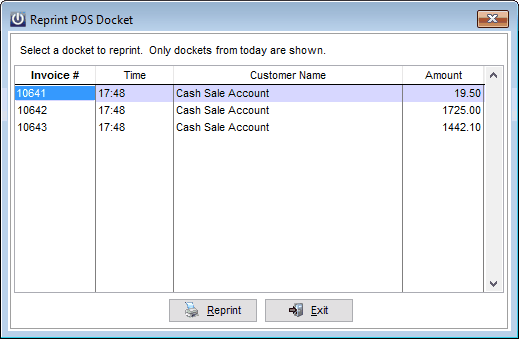
Reprint Docket
The Reprint a Docket option will display all sales made today from the selected terminal - highlight the required docket and select Reprint.
Remove Cash Drawer
Selecting this option will remove the current cash drawer from POS for this terminal and prompt for printing of a Cashup Docket which displays the total value for each payment method processed through the till.
Once the Cash Drawer has been removed it needs to be balanced. This is done through the drop down menu – Cashbook / Balance Cash Drawer. For instructions on how to balance the Cash Drawer refer to the Cashbook Section under Balance Cash Drawer.
Cash Out (Petty Cash)
Allows Petty Cash to be recorded as being removed from the till.
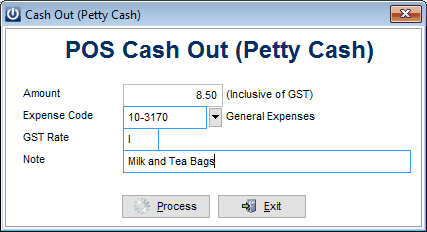
This will show up on the Drawer Contents and Cashup Docket reports.
EFTPOS
If DPS EFTPOS software has been installed on the computer there will be additional EFTPOS related menu options on the POS drop down menu i.e. EFTPOS Logon, EFTPOS Sub Total and EFTPOS Cutover. These relate to standard functionality accessible from the DPS client software.
Reprint Last EFTPOS Receipt
This requires DPS EFTPOS to be set up and allows the reprint of the last EFTPOS receipt. The reprint is done to the receipt printer.
Reports
Lists all POS reports loaded into the system.
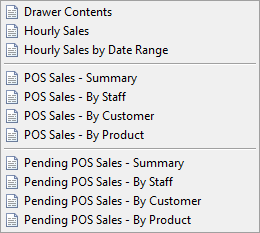
POS Reports can only be accessed from the POS drop down menu.