|
<< Click to Display Table of Contents >> Job Management |
  
|
|
<< Click to Display Table of Contents >> Job Management |
|
Job Management
Before creating new Jobs default settings need to be chosen. These are outlined in the Admin Section of the Help Manual under the following subsections.
Settings / Job Management
- Manage Job Departments
- Manage Job Status
- Manage Job Types
- Manage Schedule Centres
Defaults
Manage Job Defaults.
Job Management Control Bar
From the Job Management Control Bar, you are able to do a multitude of tasks.
| • | New allows creation of a new Job. |
| • | Modify allows modification of details of the Job currently selected in the Manage Jobs screen. |
| • | Duplicate allows duplicate of a Template Job. |
| • | Enquiry allows viewing of Transaction information for the Job (e.g. Job Costs, Invoices and Orders). |
| • | Job Card displays a Print Preview of the Job Card. |
| • | Notes shows any notes added to the Notes tab in Job Management details. |
| • | Reports displays a window listing all of the Job Management Reports. Select the required report and click Select to bring up the report window. |
| • | Exit Menu closes the Job Management Control Bar Menu and the Manage Jobs screen. |
Creating a Job
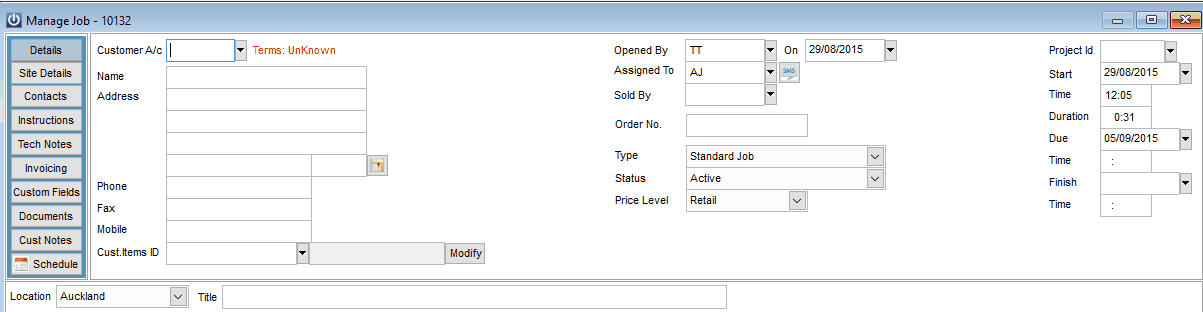
Create a Job by clicking New on the Job Management Control Bar on the left side of the screen.
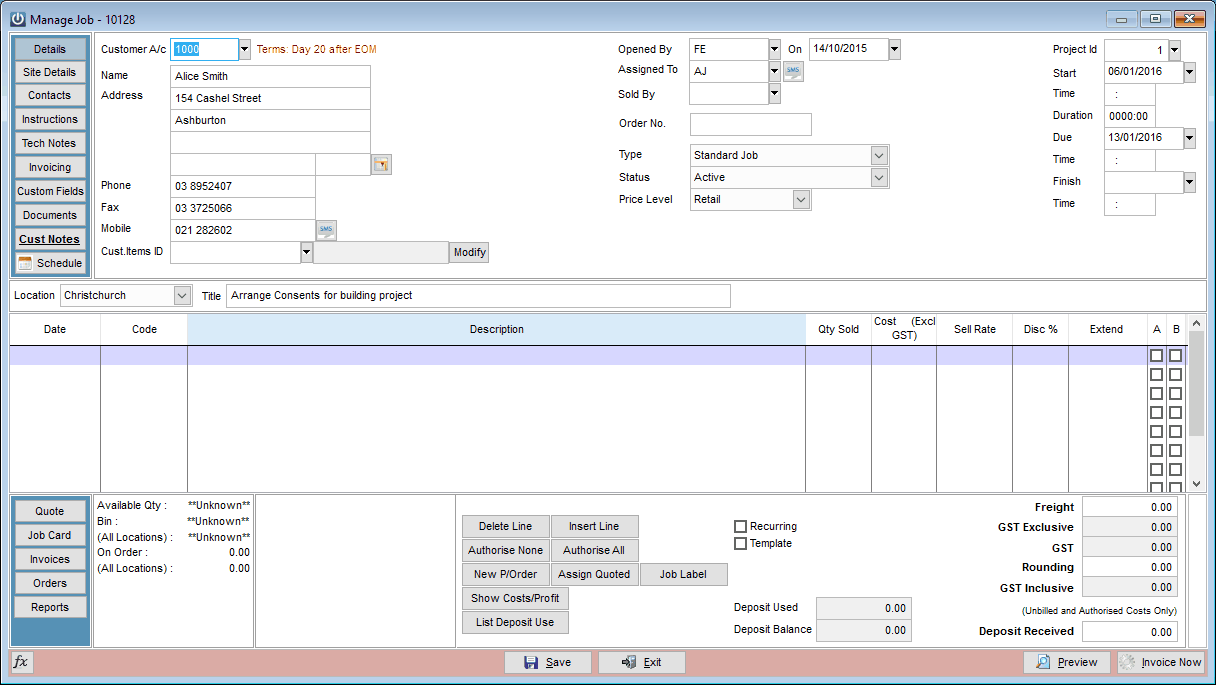
Enter the Customer A/c number (Charge Details fields will be populated) and a Job Title.
The Opened by will default to the staff member logged in Enter a Staff Code into the Assigned To field to assign the Job to a staff member. The Sold by will be the staff member id used on the invoice.
The Customers order number should be entered into the Order Number field, if the Customer account is set to require an order number the job cannot be saved without this field being completed.
The Job Type can be used to categorise and report on jobs within a business Admin / Settings / Jobs / mange job Types.
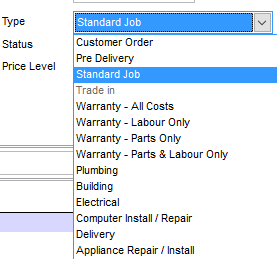
The Job Status can be used to track the progress of a job through the business cycle, additional Job Statuses may be set up by the user as required Admin / Settings / Jobs / mange job Statuses.
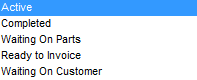
If Status is set to Complete, the Job will disappear from the Manage Jobs Screen. To view all Jobs including completed, tick the Show Completed Jobs tick box in the top right hand corner of the Manage Jobs Screen.
The default Price Level used will be that the Customer's account is set to. This can be changed for this Job if required.
If Price Level is set to either Latest Cost or Average Cost, additional boxes will display allowing a Markup Percentage to be set for each Product Job Management Type.

Enter Start, Due and Finish dates and times. These will then be sued to assign the job on the Staff Schedule.
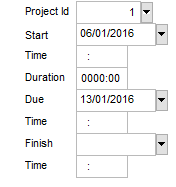
The project ID allows you to associate this job with a previously established project.
If the job has an associated Customer item then this should be selected from the drop down list.
![]()
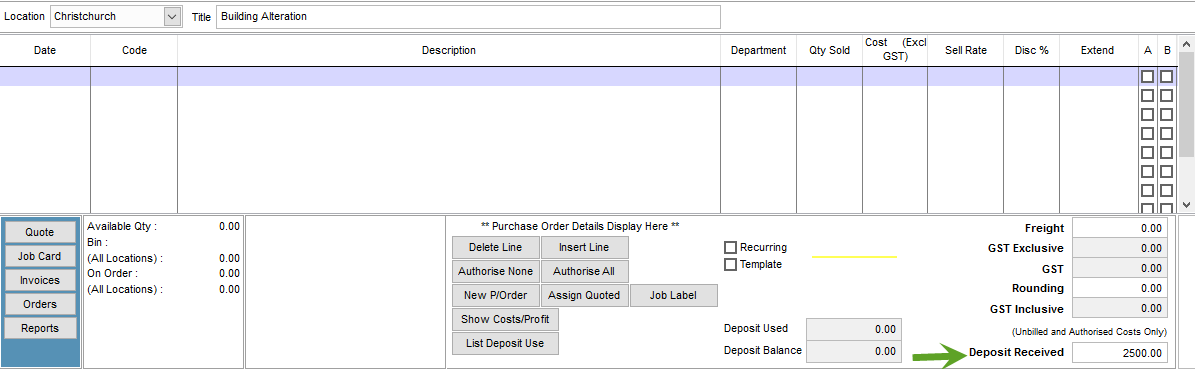
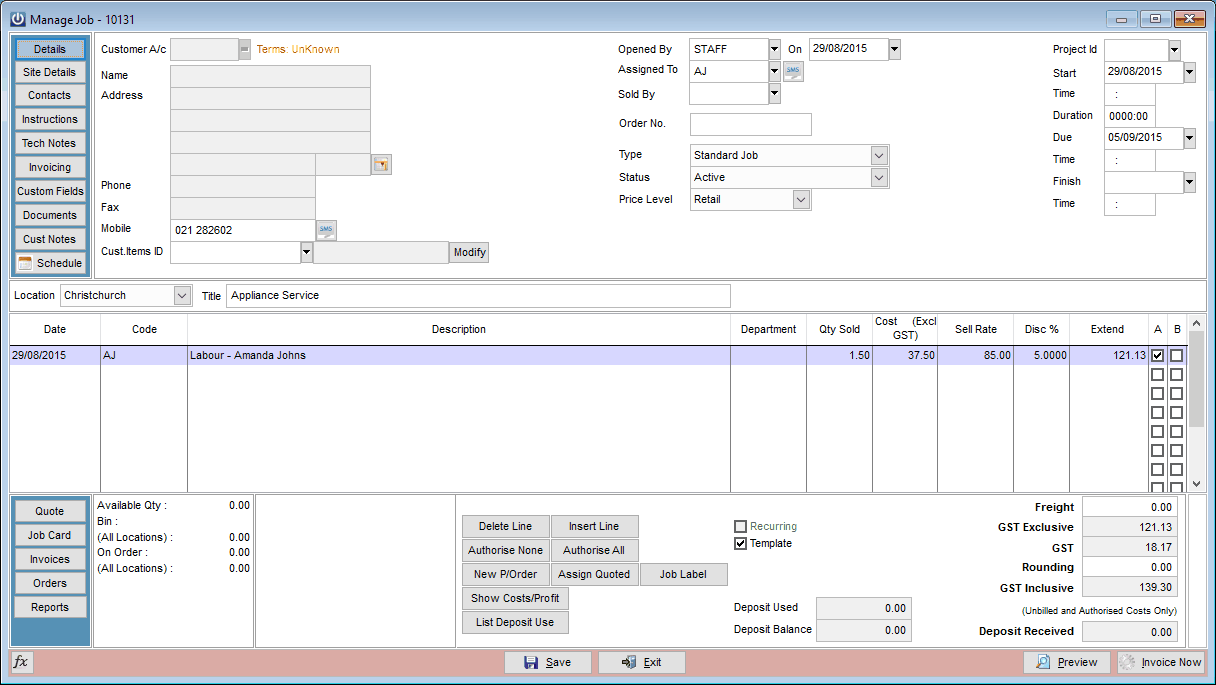
The Job location and Title should then be entered.
![]()
The Location a Job is set to will be the location any invoices will be posted against. Items put on to the Job will be come out of this location. If an item is being assigned from a different location the following pop up will appear:
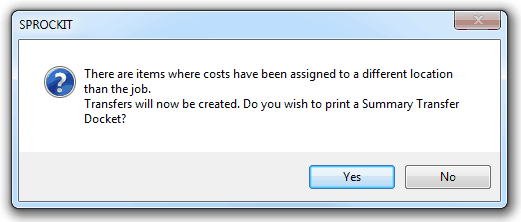
The item will automatically be transferred to the Job location and assigned from there.
Costs may be added to the Job by entering a Date and Code or scanning a Barcode.
The Job cost entry also support supplier Pricebook, entering /P into the code field will activate the available supplier price books.
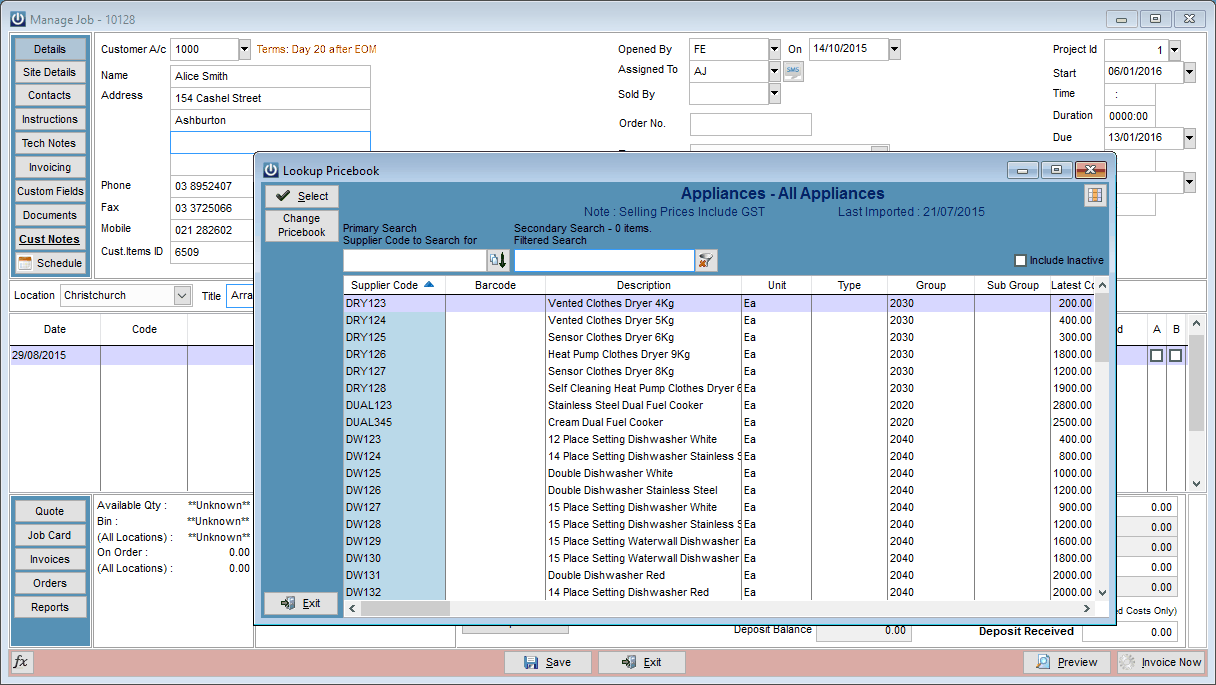
Selecting F8 on the code field will allow the use of a GL ID, F9 will provide access to the product code selection.
If Departments have been activated you will be prompted to assign the cost to a department.

Once all of the costs have been added you can click on the column head to sort job entries.

The Authorise All and Authorise None buttons allow items on a Job to be authorised or unauthorised for Invoicing. Selecting the tick box in the “A” column allows this to be done individually. Only items that have been authorised will be including in an Invoice.
Selecting the Assign Quoted option will assign all items on a quote associated with the Job, onto the Job.

You may select to assign all items to the quotes or a selected range and quantity. Items not assigned will remain available and can be added at a later date.

The Create P/Order button allows a Job Management Purchase Order to be created. By default items will be set against the Job the user is in.
A label for the Job can be printed using the Job Label option.
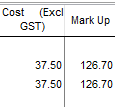
Selecting the Show Cost and profit will display the following information.
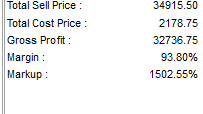
It will also activate the the cost and mark up columns on the job cost entry screen.
Job Deposits
A deposit can now be added to a Job. These funds are not credited to the Customer’s account, they are held as a Liability in the Balance Sheet until they are used to pay Invoices created against the Job they were allocated to. In order to use Job Deposits a Financial Control Link must first be set up (Admin / Defaults / Manage Financial Control Link screen). This account would normally be a Current Liability – Transaction account. Once this account is selected the Deposit Received field on the Modify Job screen will become active. A deposit can be added to a Job at any time until it is marked as completed. That being said a Deposit can only be added once. Once a Deposit is added it cannot be changed.
Adding a Deposit to a Job
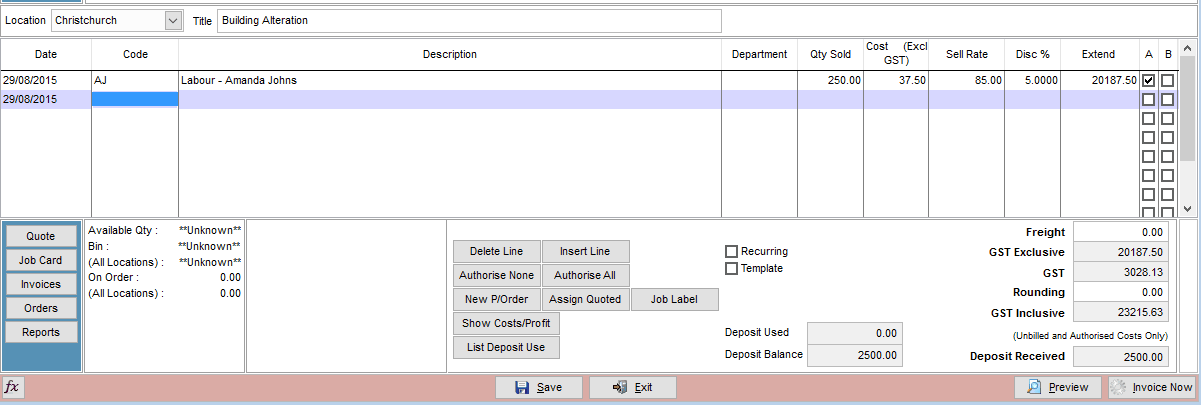
To add a Deposit to a Job create the Job as normal. Type the amount being received into the Deposit Received box in the lower right corner of the Manage Job window.
If a button within the Modify Job screen is clicked that requires a Save other than the Save button (Job Card for example) then the user is prompted to commit the Deposit. If No is selected then the requested operation is not performed.
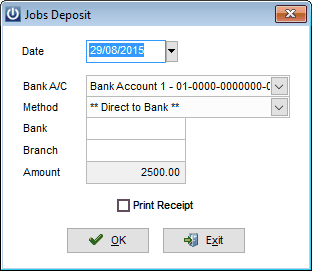
Clicking Yes or using the Save button from the Manage Job screen will prompt the following:
Using a Job Deposit to Pay an Invoice
Invoices either generated from the Manage Job screen or the Enter Invoice screen will allocate up to the unused portion of the Job Deposit to that Invoice upon Saving or Posting.
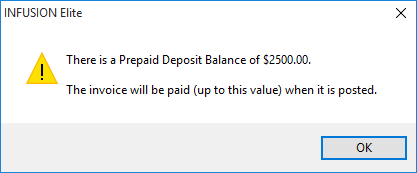
When Invoice Now is selected on the Modify Job screen a prompt will display stating that there is a deposit balance available. If you are creating multiple Invoices for the same Job this will be the amount currently unused.
The Invoice screen is next displayed. Note the new message on the Details tab. This is also displayed on the Payments tab.
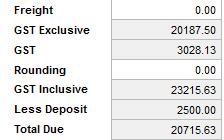
The footer of the invoice will show the total due, less the amount of the deposit used.
 .
.
The Invoice can be modified in the usual manner. The first time an Invoice is Saved (or it is Posted) the amount of the Invoice is deducted from the available Deposit balance. If the Job is being marked as Complete and there is a remaining balance of the deposit, the user is prompted in one of the following ways.
If the user cancels these screens, the Invoice will still process and the Deposit will remain on the Job.
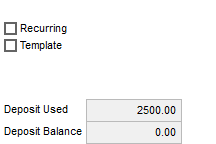
Once part or all of the Deposit has been used, the Modify Job screen will display the Deposit Used and the balance remaining (Deposit Balance). The List Deposit Use option allows for a detail list of the Deposit's use to be printed.
The Footer of the Job will now display the balance of the Deposit.
Template Jobs
A Job can be made in to a Template Job by ticking the Template Job option at the bottom of the job screen.
When the job is saved there will be no customer account or details stores.
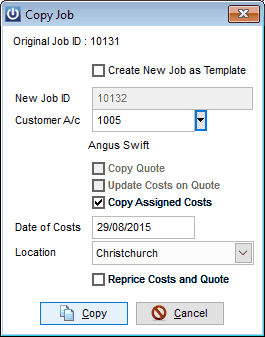
To use the template job locate the job in the Manage job screen and select Duplicate. From here you will be prompted to select the customer, and then provided with options to use the Quote, update costs from the products file, and copy the standard costs assigned to the job.
This will create a new Job the same as the Template Job including any Costs assigned to the Template if required. Costs can be assigned to a Template Job but cannot be Invoiced.
The duplicated job can be set to be a Template job as well if the Create New Job as Template option is selected. If a Quote is attached to the Job this can be duplicated by selecting Duplicate Quote. Costs on the Template Job can be brought over to the duplicated Job by selecting Duplicate Assigned Costs. The date these costs are assigned to the Job can be set by selecting Date of Costs along with the Location they will be used from. Selecting Reprice Costs and Quote will use the new Customer’s Pricing Level and current Product cost prices to update Cost and Quote values.
Jobs can be set to be recurring if the This is a Recurring Job option is selected. Once a Recurring Job is completed another with the same details will be created.
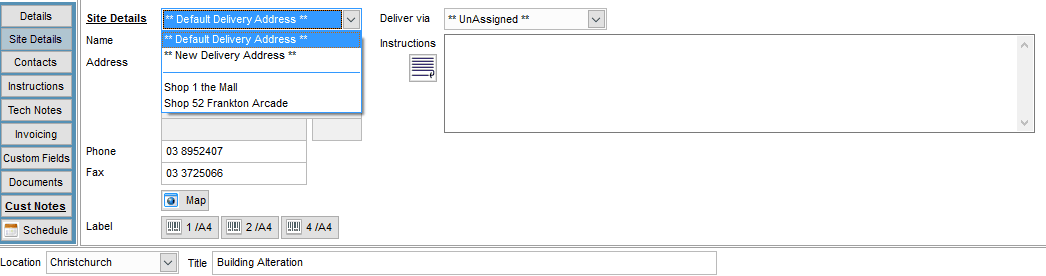
Site Details
Displays the site address associated with the Job. These details come from the Customer's account.
The Default Delivery Address can be changed by selecting the dropdown box. To enter a new Delivery Address, select New Delivery Address from the drop down list and enter the details. This will be saved as a Delivery Address against the Customer.
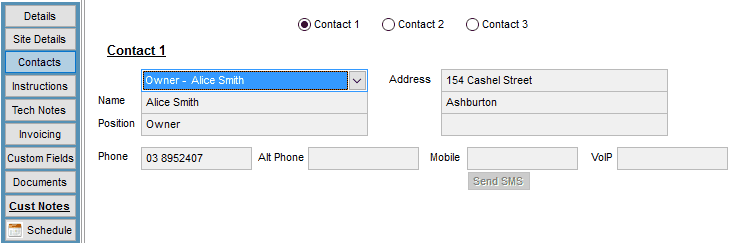
Contacts
Allows entry of up to three contacts against a Job.
By selecting New Contact from the drop down menu, entering the details then selecting Save the contact will be saved against the Customer in the Customer Details screen.
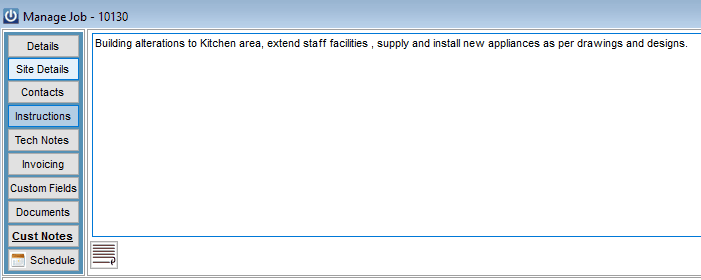
Instructions
Allows entry of Instructions for the Job. These can be displayed on the Job Card. Standard Description text can be inserted into this section.
Tech Notes
Allows entry of Technical Notes for the Job. These can be displayed on the Job Card. Standard Description text can be inserted into this section.
Invoicing
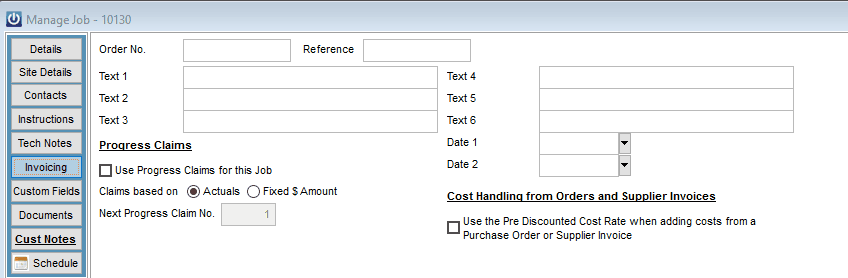
Information in these fields will flow through to Custom Fields on any Invoices for this Job. This will save entering the details when an Invoice is created for this Job.
Progress Claims can be set up against a Job. To use them first select Use Progress Claims for this Job. Select the criteria the claims are based on i.e. Actual's, Fixed $ Amounts or if there is a Quote associated with the Job as a % of Quoted. The next Progress Claim number is indicated. (Note – if using Progress Claims make sure a GL code is setup against Progress Claims under Admin / Defaults / Manage Financial Control Links).
The Cost Handling from Orders and Supplier Invoices option allows for the pre-discounted rate on a Purchase Order or Supplier invoice assigned to this Job to be charged to it. This option has a default setting against the Job Type (Admin / Settings / Job Management / Manage Job Types).
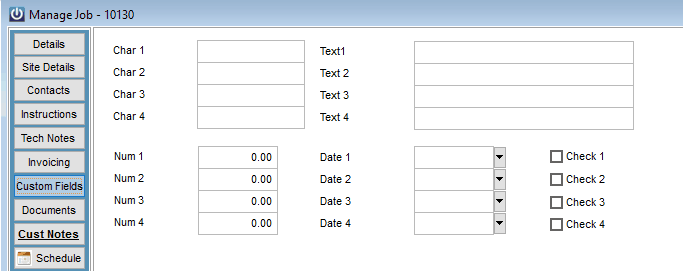
Custom Fields
Displays a selection of Custom Fields allowing for entry of additional information relating to the Job.
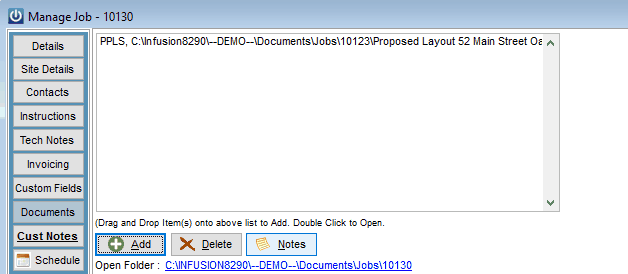
Documents
Allows for documents to be attached to a Job. To add a Document, click Add. Select the path for the location of the Document then select OK. Enter a title for the Document. Double click on the document to view it.
Cust Notes
Allows viewing of the Customer Notes for the Customer this Job is for. Standard Description text can be inserted in to this section.
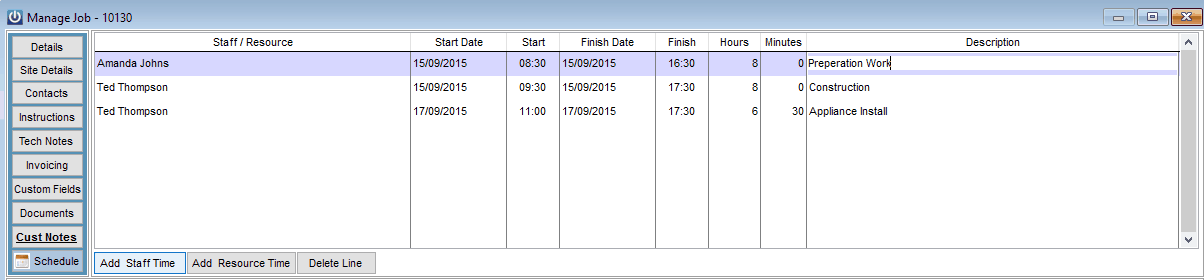
Schedule
The Schedule Button allows staff members to be selected and assigned to the job. Staff members may have multiple entries against the job, this information will then be presented on the schedule.
Quote
Allows a Quote associated with a Job to be viewed and edited. A Quote can be created if it doesn’t already exist. If a Quote is associated with the Job the text on the tab will display in red.
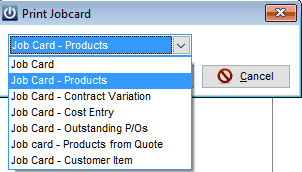
Job Card
Allows a Job Card to be previewed and printed.
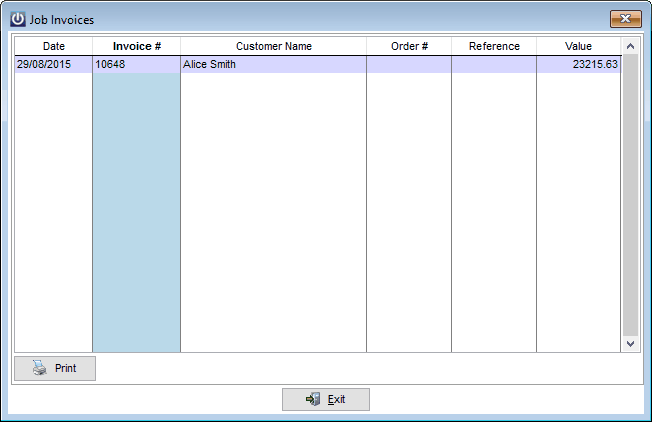
Invoices
Displays a list of all invoices created against this Job. These can be previewed / printed.
Orders
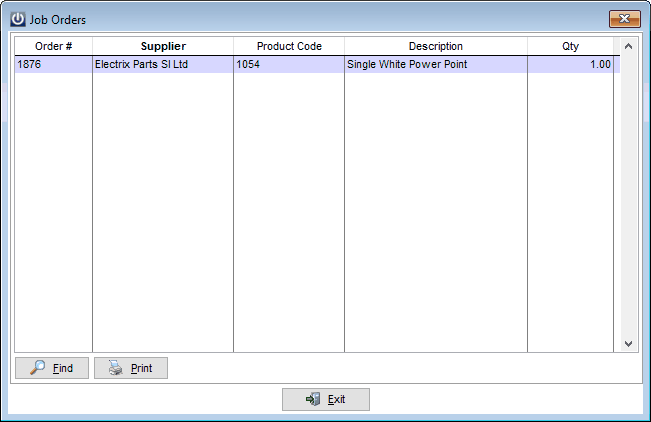
Lists any outstanding Purchase Orders assigned to the Job. These can be reprinted. If there are outstanding Job Management Orders against this Job the text on the tab will display in red.
Reports
Displays a list of reports that can be run against this Job.
Job Management Right Click Menu
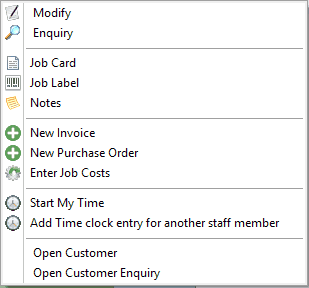
Modify – opens the Manage Job window.
Enquiry – opens the Manage Job window but in enquiry mode i.e.; details can't be edited.
Job Card – displays a Print Preview of the Job Card.
Job Label – a label for a Job can be printed
Notes – shows any notes that have been to the Notes tab for the Job.
New Invoice – Create an invoice for the job
New Purchase Order Create a new Purchase order for the job
Enter Job Costs – allows Job Costs to be entered against the Job by opening the Enter Job Costs screen. Note.
If the user has the Scheduler set up under their account the Start My Time and Add Time clock entry for another staff member options will display. These allow the user to assign labour to a Job using the Time clock from the Manage Job screen.
Open Customer – this will open the customer account associated with the job.
Open Customer Enquiry this will open the customer enquiry screen for the associated customer.
Job Management Dropdown Menu
Access the Job Management dropdown menu from across the top of the screen.

Manage Jobs
Displays a list of all Jobs. The top right of the screen has options for filtering of data on the screen. Selecting a Staff member for the Assigned To field will limit the Jobs being displayed to only those assigned to that Staff member.

The Start Date option allows for only Jobs with a Start Date of the selected date to display.
Selecting a Location will limit the display to only those Jobs set to this location.
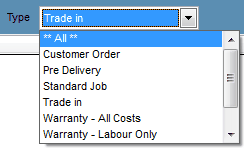
The Type dropdown option allows the screen to be filtered by Job Type. The default setting for this field can be saved in the same way as the layout of the screen can through the Fields tab.
Selecting the red crosses will clear data from the corresponding field.
Options under the Manage Job Defaults / Preferences section allow for the default display in the Job Lookup and Manage Job screens to be set to 'today'. If the Manage Job screen has this option selected the Expected Duration of listed Jobs will display under the Job Management heading for this screen.
Job Enquiry
Allows for viewing of information relating to a specific Job in enquiry mode i.e.; details can not be edited.
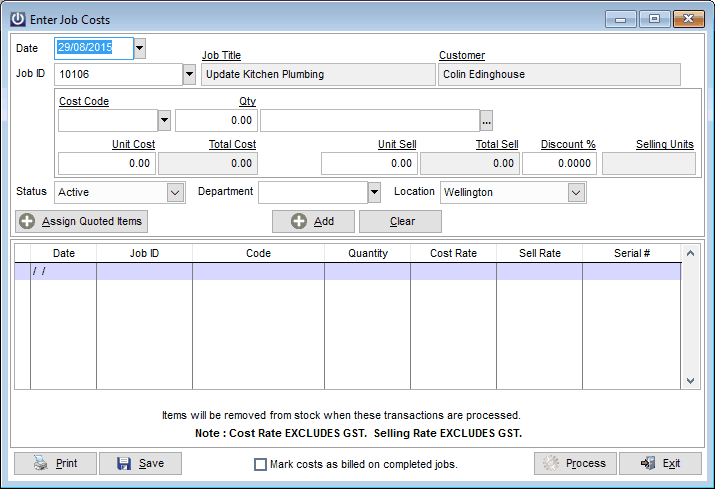
Enter Job Costs
Allows Costs to be assigned to a Job. Normally used when processing staff timesheets.
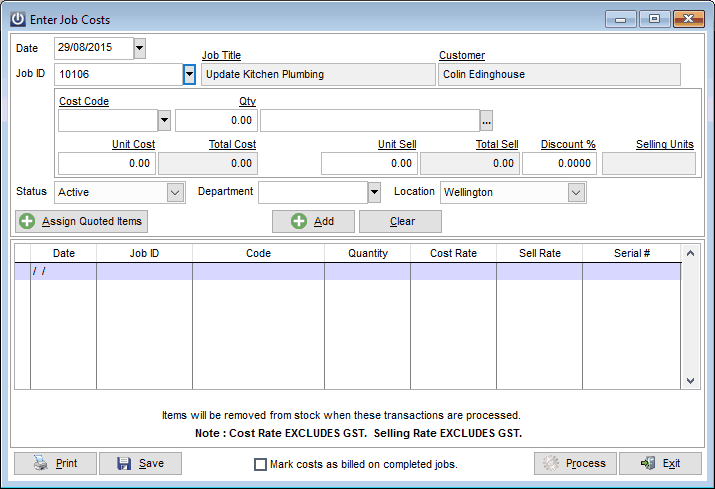
Enter the Date and Job ID. The Job Title and Customer fields will be populated when the Job ID is entered.
Enter the Cost Code. If the code has the Job Management Type set to Staff under Product Details, a box will appear to enter the start and finish times (if setup under Admin / Defaults / Manage Job Defaults / Cost Entry, these must be entered in 24 hour clock format), otherwise enter the Quantity.
To enter additional notes relating to the Cost Code, click on the ellipsis “…” button at the end of the Cost Code description field.
The Unit Cost and Unit Sell boxes will be populated when the Cost Code is entered. These can be edited. A Discount % can be entered.
The Job Status field allows the status of a Job to be changed. The status will change immediately the new status is selected. A Job cannot be changed to a Completed status from this screen.
Costs can be assigned to a Department and Location if these settings have been activated under Manage Job Defaults / Cost Entry.
The Assign Quoted Items button allows all items on a Quote linked to the Job to be assigned all at once. If required these items can be deleted before they are Processed.
Select Add to enter the Job costs.
To delete a Cost select it from the grid and select Clear.
Select Print to print a copy of all Job Costs entered. The Save option allows the costs to be saved and recalled at a later date. Once you are ready to process all the Job Costs, select Process.
When selected the Mark costs as billed on completed jobs option will mark any costs as billed if they are being put on to a Completed Job.
Bulk Invoice Jobs
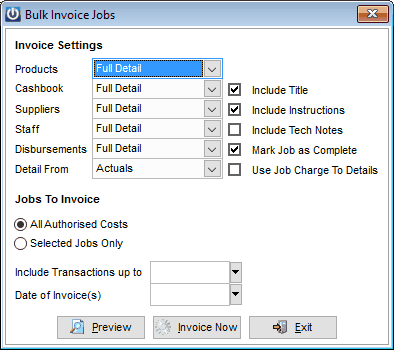
Allows Invoices to be created for all Jobs with authorised Job Costs in one step.
Select the Invoice detail settings to be displayed for Products, Cashbook, Suppliers, Staff and Disbursements costs that appear on the Invoice. These include:

Full Detail – Every line will be displayed individually.
Summary – Only one Summary Line with a Total will be displayed for each product code.
Summary by Department – If Departments are set up then a Summary line for each Department will be displayed.
Total – A Total Line will be shown showing a total amount.
Do Not Include – No details will flow through on the Invoice.
Do Not Include - Mark as Billed – No details will flow through however an enquiry will show these costs as being billed.
NB: These settings will have no affect if Detail From Quoted is selected.
If the All Authorised Costs option is selected all Jobs with authorised costs up to the Include Transactions up to date will have Pending Invoices created for them.
If the Selected Jobs Only option is chosen, click on the Click to Select Jobs button to allow Jobs to be tagged individually for Invoicing.
Select the Date to Include Transactions up to and the Date of the Invoices to be created. Select Invoice Now to create Pending Invoices for the Jobs selected.
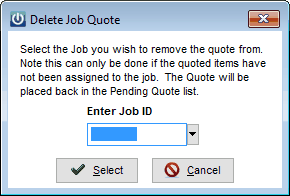
Remove a Quote from a Job
Allows a Quote linked to a Job to be deleted. This can only be done if the items on the quote haven’t been assigned to the Job. Once done the Quote will be placed back in the Pending Quotes list.
Schedule / Calendar Functionality
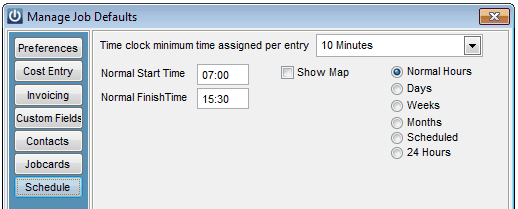
Setup
Before the Job Management Scheduler can be used a number of default settings must be entered. From the Admin / Defaults / Manage Job Defaults / Schedule menu:
1, Set the Normal Start and Finish Times for the business.
2, Select whether the Map will show by default.
3, Set the default time frame for the Schedule view.
From the Admin / Settings / Job Management / Manage Schedule Centre menu Schedule Centres are created. These are used for grouping of Staff Members on the Schedule.
To activate a Staff member for use of the Scheduler select the Activate Schedule / Calendar option under the Staff member's account. POS and STAFF users will have no access to the Scheduler.
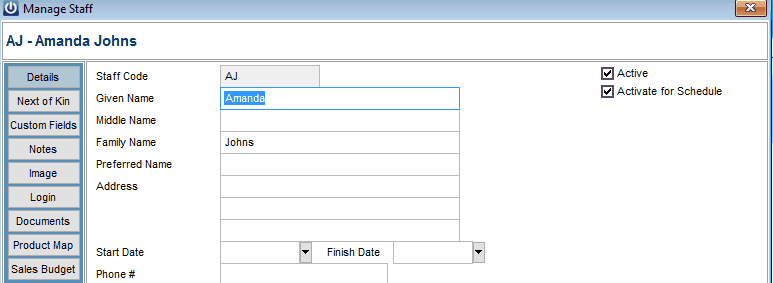
Under the Login tab of the Staff account set the viewing level for the Staff member.
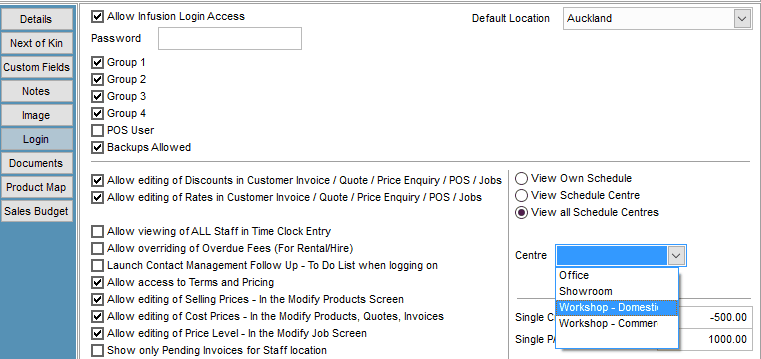
The staff member can be set to view just their own Schedule, the Schedule relating to the Centre the Staff member is associated with or view all Schedule Centres.
The Staff member can be set to be associated with one of the Schedule Centres by selecting from the Centre dropdown box.
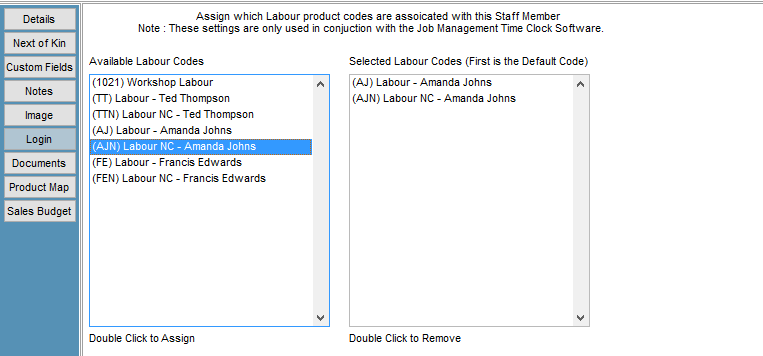
At least one Labour Code needs to be set up under Product Map. Selected codes will be available for use when charging time to a Job through the Time Clock function.
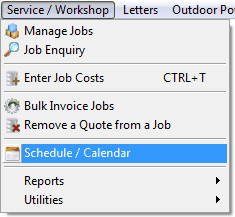
Opening the Scheduler
To open the Scheduler function select Schedule / Calendar from the Job Management dropdown menu.
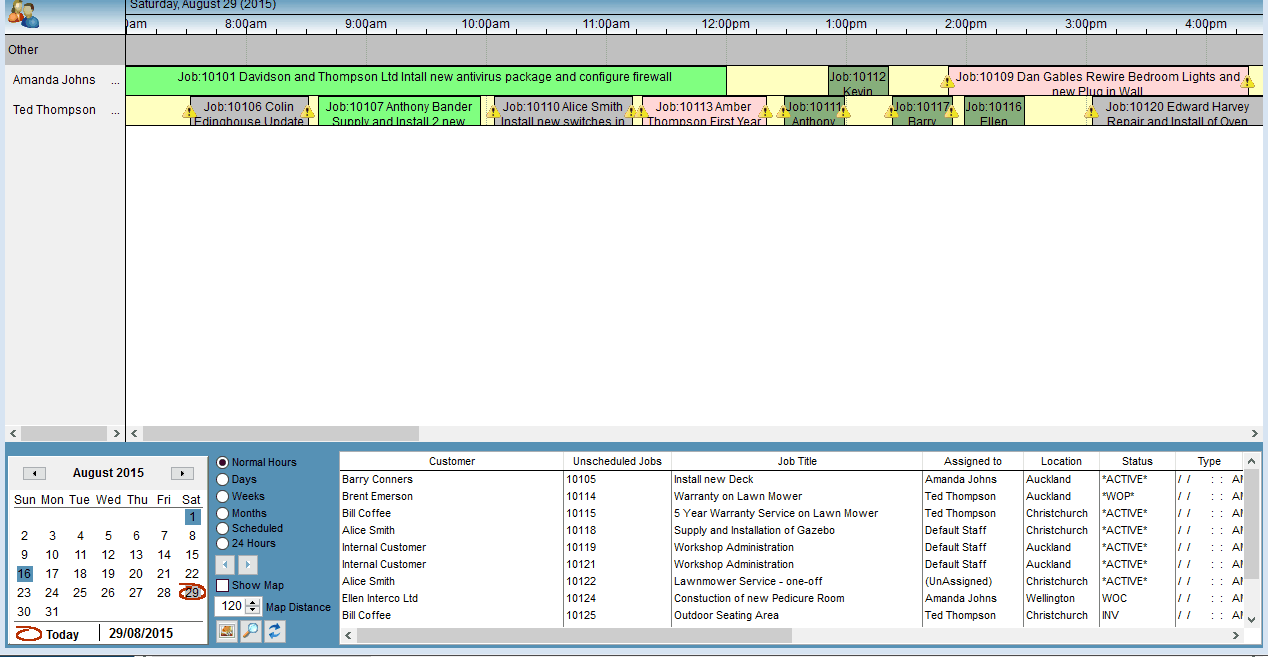
The Current Time is indicated by a red line on the calendar.
If multiple Schedule Centres have been set up Staff members will display under whatever centre they have been associated with. If they haven't been associated with a centre they will display under Other.
Assigned jobs will appear againstteh assigned staff member, starting at the Start time entered onto the job, covering the time period indicated under the Duration on the job.
Jobs can be stretched to increase the time or drop and dragged to be reassigned.
Adding a new Time bar
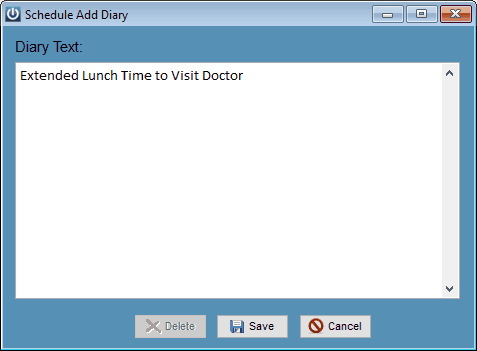
To add a new time bar into the Scheduler click in the row for the Staff member and drag the mouse. A pop up will then appear allowing setup of a new Job or Diary Note.

If a Diary Note is added a pop box will display allowing text to be added. This text will display in the Note bar.
If Add New Job is selected the Modify Job screen will open allowing entry of the Job data. The Assigned To staff member, Start Date and Time along with Duration will set the position and length of the bar. The Job Number, Customer Name. Job Title and Customer Items description will display in the bar.
Time bar images
The colour of the bar will be that set against the Job Status.
![]()
Clocks will appear and the colour will have a gradient when someone is working on the Job (ie assigning time through the Time Clock).
![]()
Exclamation Marks at each end of the bar indicate that the Job is overdue.
![]()
The text that displays in the Time bar is Job Number, Customer name, Job Title, Customer Item Title.
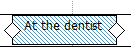
A scheduled Diary Note appears in Scheme colours with hatched fill and diamonds at each end of the bar.
Scheduler Right Click menu
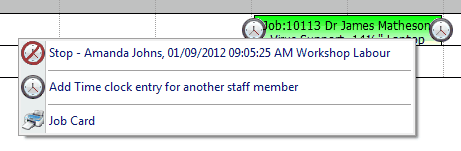
Right clicking on a Job in the Scheduler will display a pop up menu.

The Time Clock can be started (for the logged in user) by selecting Start My Time.
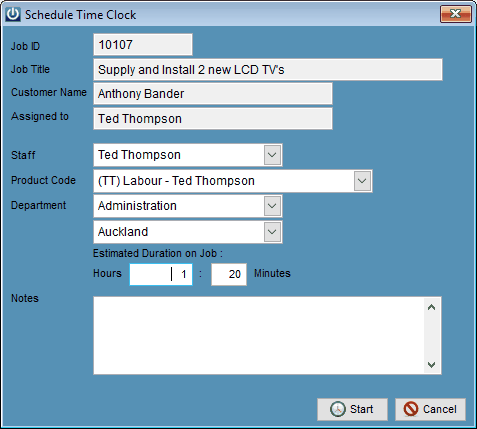
Select Start to start adding time.
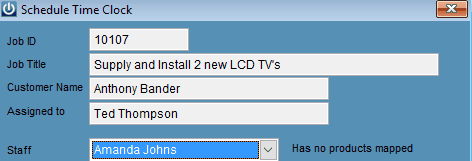
If the Add Time Clock entry for another Staff member option is selected the Staff option in the Schedule Time Clock screen will allow for selection of other Staff members.
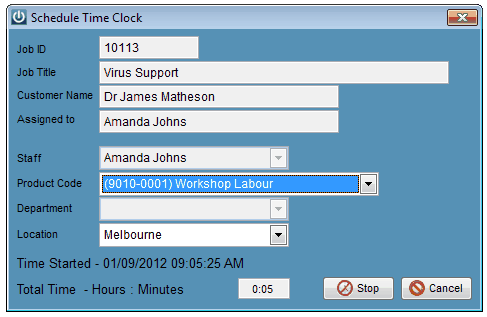
Right clicking on a Job a Staff member is currently working on will display an option to stop the Time Clock for them
Selecting Stop will display the Schedule Time Clock screen and allow the Product Code, Department and Location to be selected / edited.
Selecting the Job Card option from the right click allows previewing and printing of a Job Card.
Scheduler screen options
| • | Double clicking on a Job time bar will open the Modify Job screen for it. |
| • | Double clicking on a Job in the Unscheduled Jobs list will also open the Modify Job screen for it. |
| • | Dragging an Unscheduled Job into the calendar for a Staff member will assign the Job to them. |
| • | To put a Job back into the Unscheduled list open the Job by double clicking on it and remove the Start, Time and Duration values. |
| • | The Start time for a job can be changed by dragging the Job within a row. |
| • | The Duration of a Job can be changed by dragging either the left or right end of the bar. |
| • | Jobs can be assigned to a different Staff member by dragging them to the required Staff member's row. |
Note: any changes made in the Scheduler will update information in the Modify Job screen and vice versa.
Pins
Notes can be added by right clicking in any Staff member's calendar and selecting Add new Pin. This will display the Schedule Add Pin window.
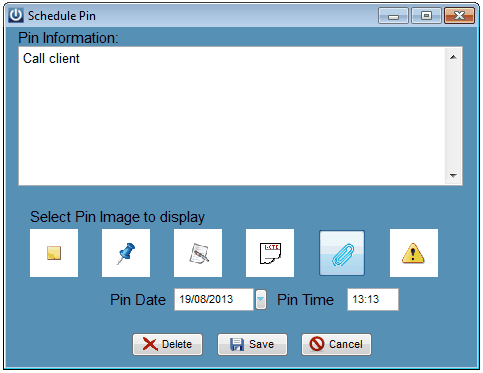
Double click on the Note in the Scheduler to edit it. The icon displayed in the Scheduler for the Note can be set by selecting one of the six displaying then Save.
Double click Note or Diary Note to reopen edit / delete.
Calendar
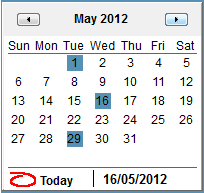
| • | The Calendar at the bottom left of the Scheduler screen highlights the days with Jobs scheduled. |
| • | The day the Scheduler displays can be selected by clicking on it in the calendar. |
| • | The date at the bottom right of the calendar is the selected date. |
| • | Toggle to the next month by selecting the forward and back arrows at the top of the calendar. |
Schedule Controls
The radio buttons allows selection of different time frame views for the Scheduler.
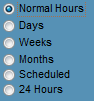
- Normal Hours displays as per the Job Defaults normal hours for the selected day.
- Days displays the selected day plus one day either side of selected day.
- Weeks displays the selected day plus one week either side of selected day.
- Months displays the selected month and next month.
- Scheduled displays timeframe that covers all Scheduled Jobs
- 24 Hours displays the 24 hours for the current day.
The left and right Arrows ![]() increment the selected date.
increment the selected date.
The Show Map option ![]() switches the map which displays the full time frame for the selected setting.
switches the map which displays the full time frame for the selected setting.
The Map distance spinner ![]() is used to zoom in or out of the displayed time frame.
is used to zoom in or out of the displayed time frame.
The Image button ![]() allows images of the Schedule to be saved to file.
allows images of the Schedule to be saved to file.
The Search button ![]() will search for a Job Id within the Schedule.
will search for a Job Id within the Schedule.
The Refresh button ![]() is used to manually refresh the scheduler. Note: the Scheduler auto refreshes when you click off then back on to it.
is used to manually refresh the scheduler. Note: the Scheduler auto refreshes when you click off then back on to it.
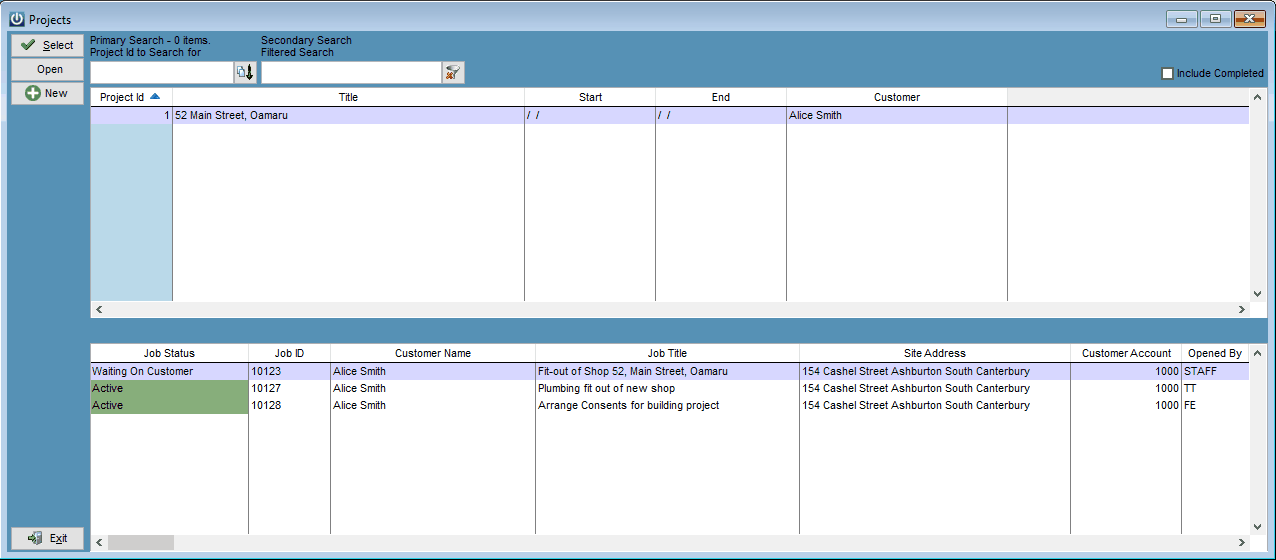
Manage Projects
The Project functionality allows for jobs to be grouped together and reported on by a Project ID.
To Create a new project Select the New.
Give the project a Title and Select the Customer.
Enter the expected Start Date and Finish Date along with relevant Notes.
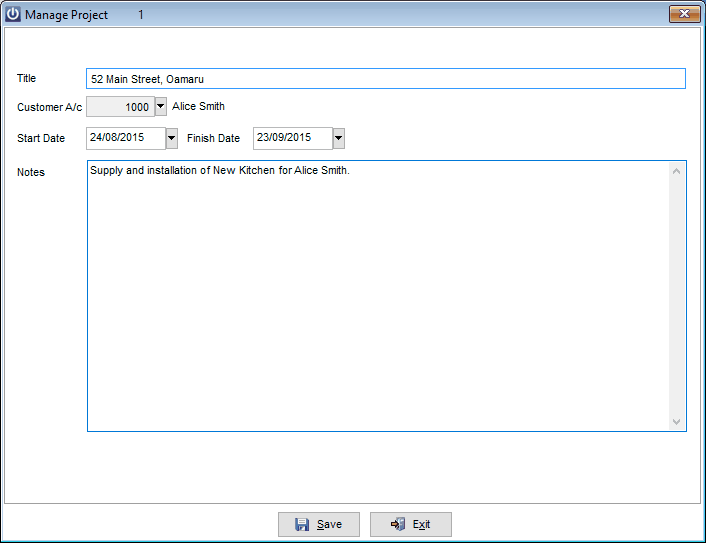
All associated jobs with this Project ID will now appear in this screen, Double clicking on the job will open it from this screen.
All Job reports have a range for Project ID.
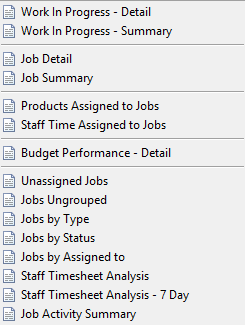
Reports
Lists all Job Management Reports.
Utilities
Export All Jobs
This will allow exporting of Job information to a CSV file (default file name jobidx).
Purge Completed Jobs
Allows Completed Jobs with a specified completion date to be deleted. Jobs with a blank Completion date can be included in this.