|
<< Click to Display Table of Contents >> Help / Miscellaneous |
  
|
|
<< Click to Display Table of Contents >> Help / Miscellaneous |
  
|
•Help Menu
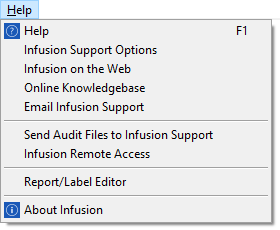
- Help (F1)
Clicking Help or pressing the F1 key will open your web browser to the Online Help Files – Printed copies are available from Infusion Business Software on request.
- Infusion Support Options
This provides a link to the Support information on the Infusion Business Software website.
- Infusion on the Web
A link to the Infusion Business Software website.
- Online Knowledgebase
This link will take you directly to the Infusion Business Software Online Knowledge base proving answers to commonly asked questions.
- Email Infusion Support
Email Infusion Business Software with any questions, queries or comments.
- Send Audit Files to Infusion Support
Will allow a copy of the Audit log files and System Control settings to be emailed to Infusion support. Email defaults need to be setup to allow for this.
- Infusion Remote Access
Starts up Infusion’s support software that allows the End User to give Infusion support staff access to their PC.
- Report/Label Editor
Opens the software utility that allows editing of reports and labels in the Custom folder.
- About Infusion
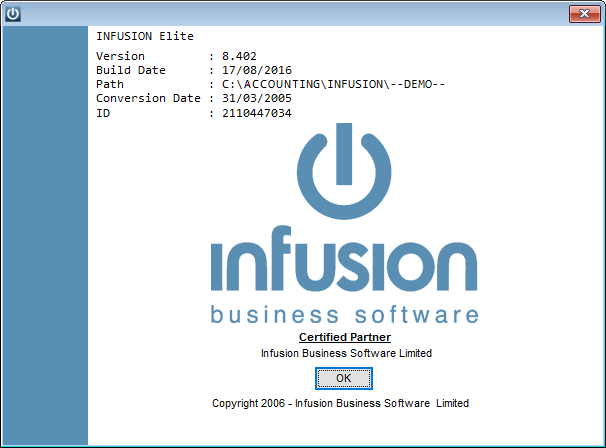
Displays the version, installation path and conversion date information relating to the installed copy of Infusion software.
•Miscellaneous
- Cashbook General
If you enter a transaction date more than one year in advance or two years in arrears you will be warned that it falls outside the current date range.
- System-wide Features
You can change the appearance of Lookup and Manage screens. By clicking the Fields icon on the top right of the screen, a window will pop-up that will give control of columns that are to be displayed.
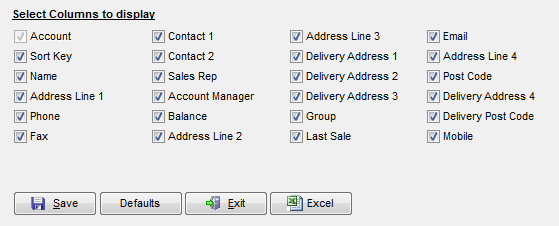
Field options for Customers.
The order in which columns are displayed on the screen can be changed by clicking and dragging the column to the new location. Clicking the Save button with the new column layout will save changes. Clicking Defaults will return the layout to its default settings.
System wide all reports may be printed to a PDF, Excel, or Word file with the option to change the report title as required. The title can be saved by clicking the Save button on the Print Report screen and will be recalled when the report is run again. The title may also be deleted. With having the Excel format all reports can therefore be exported.
The results displayed from searching can be exported to a spreadsheet using the Excel option from this screen.
- Searching
Primary Search
The Primary Search works on a single column. Selecting the icon to the right of the Primary Search field will display a list of columns available to be used.

Alternatively, the column header can be selected or, with no data in the Primary Search field, Crtl Z selected to display the pop up list.
The header of the selected column will display with a triangle to the right of the title text indicating if the column is sorted in ascending or descending order.
When typing text in, if there isn't an exact (full) match of the text at the beginning of a record then it will show in red. Once an exact match is achieved the text will show in black.
Typing text into the Primary Search field will take the selection bar to the first record beginning with this string. If there is no exact match the text will display in red and the selection bar will go to the closest match it can find.
Entering a "%" sign before a string will allow for searching within the selected column e.g. on the Product Description field entering %saw will search for all entries with saw in the field. Only entries with "saw" in the field will display. If there is no exact match the whole field the text will stay red. It will change to black when there is an exact match. To activate the search, tab to the Filtered Search field.
Any column displaying on the screen is able to be sorted on once a Primary search has been performed.
Filtered Search (Secondary Search)
If no text is entered into the Primary Search field, then the search works as per normal.
For large data sets the Primary and Secondary search fields can be used in combination. To do this, firstly select a column to sort by, enter characters into the Primary Search field and tab to the Secondary Search. This will limit the list to entries matching (beginning with) this string. The resultant number of items will display in the heading text for the Secondary Search. In the following example there were a total of 4439 Customers. By having the Name column selected then entering "ac" into the Primary Search field, when tabbing to the Secondary Search field (or by clicking into it) the list gets limited to 57 items. A Filtered Search can then get done on this list.

If data is entered in a logical manner, then this combination can be used well to improve the search performance especially on larger data files.

For large data sets enter into the Primary search field at least one character (the more the better). On average Enter 1 characters for 5000 items, 2 characters for 10000 items, 3 characters or more is better for 10,000 plus items. Then Tab to the filtered search and use as normal.
The fields that are used in the filtered search in each Manage screen are:
Customer: Account, Sort Key, Name, Address 1, Address 2, Phone
Supplier: Account, Sort Key, Name, Address 1, Address 2, Phone
Products: Code, Description, Barcode (Primary)
Jobs: Customer Name, Job ID, Job Title, Phone, Mobile
Financial: ID, Name
Customer Items: Serial Number, Description, Customer Name
The search is case insensitive.
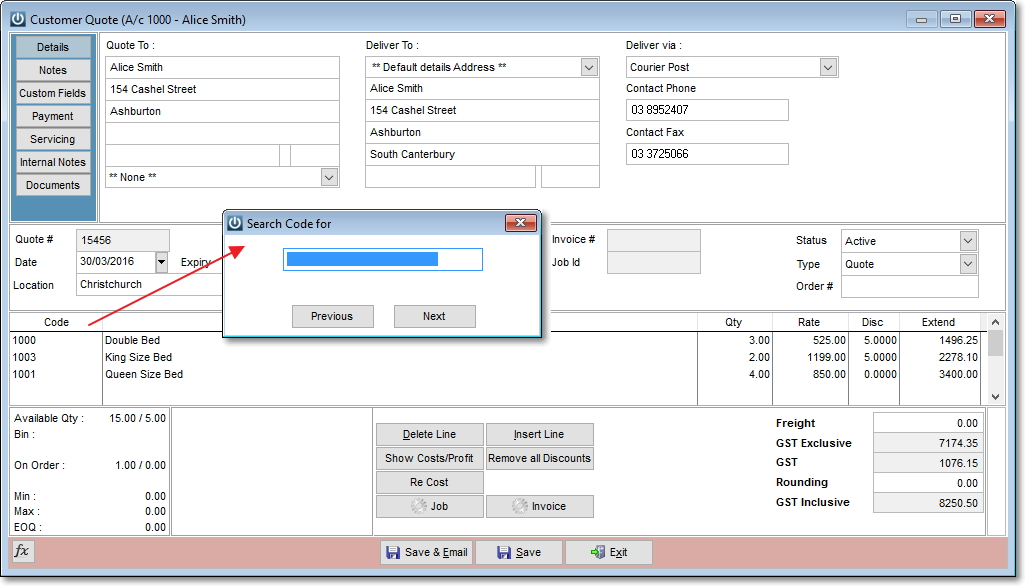
There is also the ability to search on grid columns throughout the system, by RIGHT CLICKING on the column header. For example, in the grid of a customer invoice, RIGHT CLICK on the CODE field and a window pops up where a code to search for can be typed, allowing also to search previous or next value.
- Backup
Logging out of Infusion software, a pop up message will ask “Do you want to backup your data?” Click OK if a backup is to be done. The Default Path sets the directory / folder the backup will be made to. An option is available to backup images. Click the Backup button and the location the backup is to be saved to. Click Save. To test the backup, click Yes on the pop up window asking “Do you want to test the backup file?” Your backup file will then be unzipped to a test backup folder. A window will then appear saying backup successful.
- Scheduling of Reindexing
Infusion can be set up so reindexing is scheduled through Windows task Manager.
Create a shortcut as below (Same as a normal shortcut but add the key word REINDEX at the end of the target. This can then be included in a task scheduler to happen at a certain time of day. A check is made as to whether there are any users in the system before reindexing.
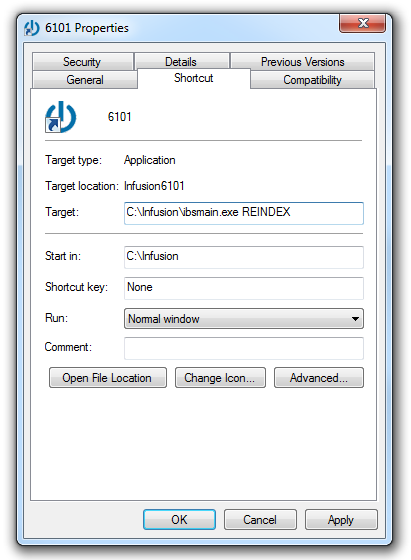
An audit log entry is created for each time the reindex is run. The entry will note whether the reindex failed or not. By default, only the file DATA will be reindexed. A data file can be specified for reindexing by entering the file name after the REINDEX text in the shortcut (e.g. REINDEX Data002 to reindex data file Data002).
- Opening a specific company file
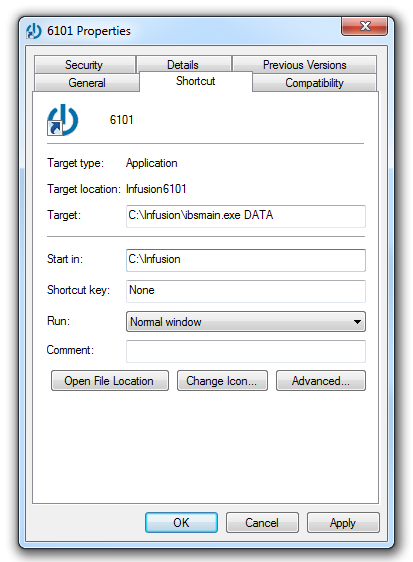
Allows a shortcut to be created that will open a single data file.
Create a shortcut as per below (i.e. same as a normal shortcut but adding the company data path as a keyword at the end of the target). Please ensure the keyword is entered in capital letters (e.g.: DATA).
- Report Preview Options
When previewing a report in Infusion the toolbar provides a number of options including:
1) Email - the report can be emailed directly from this screen
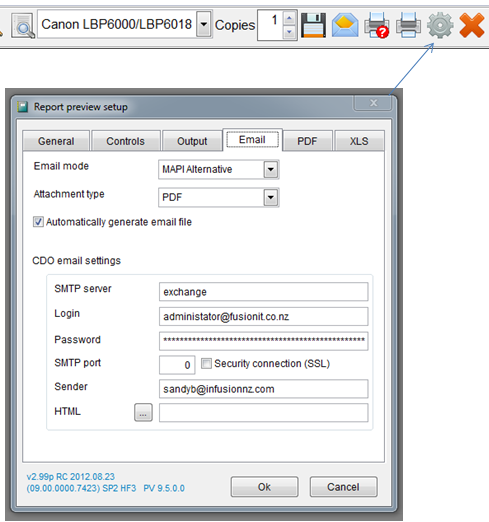
By setting the system to use the MAPI Alternative mode the default email program will be used. If this is Outlook, it will use Outlook settings to send email and go through the Sent Items folder. SMTP, Login and Password details will be taken from Outlook.
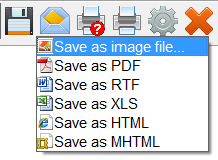
2) Selecting the diskette icon will display a number of options for exporting the report to; the most useful being CSV
